


technique: sous vide tempering chocolate
 Technique: sous vide tempering chocolate
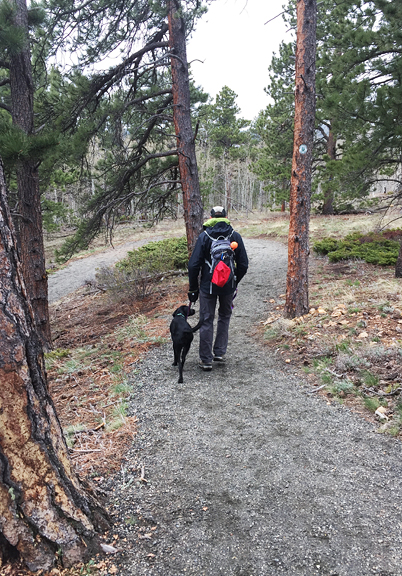
Spring in Colorado is that lovely fickle season that throws it all at you – snow, rain, sun, fog, hail. That means flexibility is key to getting outside for some adventure and exercise. In our house, we keep four bins of gear at the ready in our living room. During winter months, the bins are: resort skiing, backcountry skiing/touring, skate skiing, classic skiing. In summer, the bin contents are swapped out for hiking, biking, trail running, and paddling gear. But spring means it’s all a slightly organized mess, a mish mash of late skiing and early running gear co-mingling in a way that mimics the snow and the trails in the backcountry right now.
jeremy skiing in rocky mountain national park

it wasn’t great snow, but right now we’ll just take any snow

après ski visit to trail ridge road

riding in boulder with a nice view of the flatirons

no matter the weather, neva always gets her fetch session
I had planned to get this post up some time Monday after reporting for jury duty in the morning, but against many odds, I was selected for a 2-week trial. Yay?! I’ve been called for jury duty once before about 16 years ago and got selected for a trial then, too. And while I am always hoping to NOT be selected for a jury (somehow I’m batting 0), I will say that it is something many citizens should experience at least once to see the workings, the flaws, and the positive aspects at a local level. Not to mention, the jury selection process alone gives one a rare cross-sectional glimpse into our community. You learn things about people. And if we can’t relate to people, then where does that leave us?
Mother’s Day is this Sunday, and instead of sharing a recipe, I’m sharing a technique with you. Tempering chocolate comes in handy when candymaking or creating edible decorations or dipping things like fruit or cookies. Tempered chocolate results in a more stable chocolate coating that is shiny and has a lovely snap. It is definitely more effort than simply melting chocolate, but for me, the final product is far superior. I’ve shown how I temper chocolate on a number of recipes on this blog (I use the seed method). However, once the chocolate is in temper, it’s really hard for me to maintain the tiny temperature range where it remains in temper – particularly for small batches of a pound or less. After borrowing my friend’s sous vide, I began to look into using it for tempering. I read through Kenji’s overview of chocolate tempering on The Food Lab and decided against the sous vide method. He tempers his chocolate in a sealed pouch which isn’t helpful when I want to dip a lot of things into tempered chocolate. But tempering the chocolate is not the hard part. The challenge lies in keeping the chocolate at a constant temperature so it remains in temper. That’s actually where the sous vide cooker is the perfect solution.
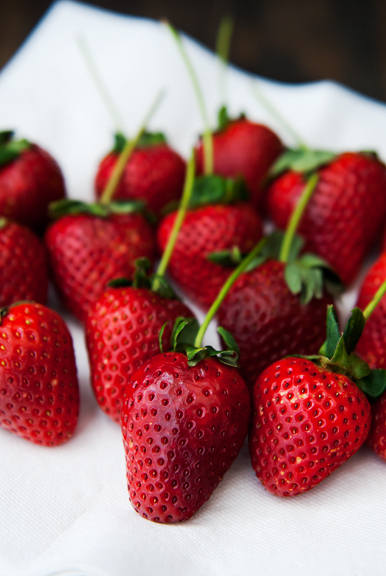
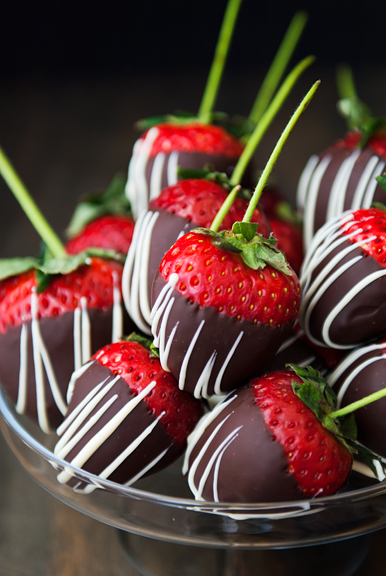
let’s say you want to dip some strawberries in tempered chocolate
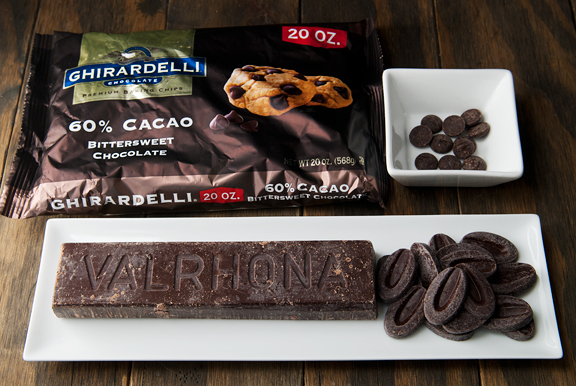
There are basically three, maybe four kinds of chocolate: dark chocolate, milk chocolate, white chocolate, and caramelized white chocolate. I haven’t worked with caramelized white chocolate, but one of my clients uses it in her confections. I typically work with dark chocolate, will occasionally temper white chocolate, and very rarely milk chocolate. A warning about white chocolate: don’t use a white chocolate that contains palm kernel oil or coconut oil because it will not temper (it separates and becomes useless). You need to use proper white chocolate that has real cocoa butter, which means it’s going to cost you some money.
you will need chocolate – try to use a good quality chocolate
So let’s temper some dark chocolate using the seed method. The reason I use the seed method is because it’s the one I learned in my pastry skills course a decade ago, and I have enjoyed a high success rate using it. Melt most of your chips, féves, or chopped chocolate (reserve some for seeding) in a bowl over a water bath’s gentle heat until it reaches a nominal temperature, which you are measuring with a thermometer. Yes, use a thermometer. It’s important not to let a single drop of water (including condensation from steam) touch the chocolate because it can seize and you won’t be able to salvage it for tempering. If it does seize, don’t throw that chocolate away! You can still use it in baking and such, just not tempering. In the case of dark chocolate, I try to target 118-120°F as the maximum. Because there is some heat capacity in the body of melted chocolate and the bowl, I find when the temperature reaches 112°F, I can remove the bowl from the water bath and it will continue to rise in temperature to about 118-120°F as I set the bowl on an ice pack or in an ice bath to cool. For milk and white chocolates, your target temperature is a few degrees cooler: 116-118°F, so I would remove the chocolate from the water bath around 110°F.
place most, but not all, of your chocolate in a heatproof bowl

set the bowl over a simmering water bath
cool the chocolate on an ice pack or in an ice bath
Once the chocolate begins to cool, you need to do two things: 1) agitate the chocolate and 2) monitor the temperature. Agitating the chocolate means stirring the melted chocolate. I tend to stir the chocolate in a figure eight. The purpose of agitating the chocolate molecules is to encourage proper crystal formation of the cocoa butter – this is what gives tempered chocolate that structural strength and shiny finish. As the temperature drops, take note when you reach 95°F (for dark, milk, and white chocolates). At this point, you might want to remove the chocolate from the ice pack or ice bath to slow the cooling. Then you will toss in those reserved chips, féves, or chopped pieces to seed the chocolate (about 10 chocolate chips should do it). The chips, féves, and chopped pieces are presumably tempered chocolate. That’s how most commercial chocolate is sold – tempered. The idea is that saving some of these tempered pieces out and reintroducing them to the melted chocolate at the right temperature (the range where cocoa butter crystals are most amenable to alignment) will seed or initiate the crystal formation we are seeking in tempered chocolate. Continue agitating the chocolate as the temperature continues to drop. The temper range for dark chocolate is 88-91°F. For white and milk chocolates, it is 85-87°F.
at 95°f, seed the chocolate with tempered pieces of chocolate

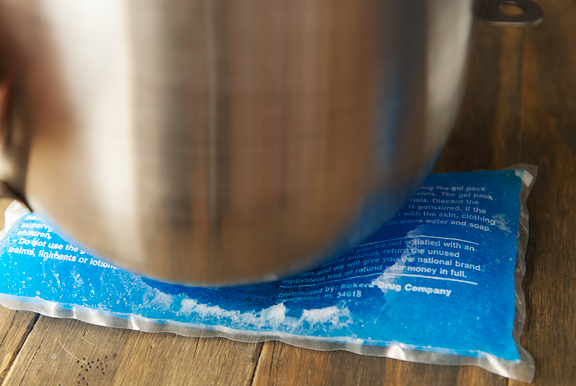
Now that your chocolate is in temper, it’s time to start dipping, right? Yes and no. Thermodynamics dictates that the chocolate will continue to cool. It doesn’t take long for it to slip right out of its temper range. I used to juggle my bowl of tempered chocolate between a pot of warm water and an ice pack to maintain that three degree window, but it was difficult to do while enrobing candies at the same time. This is where the beauty of the sous vide comes in. The sous vide immersion cooker can hold a water bath at the precise temperature needed for tempering. In this case, for dark chocolate, 91°F is ideal. I found a nice tub large enough to accommodate my bowl and the sous vide cooker and clipped the bowl to the side of the tub with a clamp from the hardware store. This wouldn’t work if I used a glass or pyrex bowl because the sides are angled rather than straight like my stand mixer bowl. I highly recommend that you set this up without the chocolate to make sure it all works/fits properly BEFORE introducing the chocolate. The last thing you want is to temper your chocolate and then have to wrangle the bowl in the water bath and accidentally get water into your chocolate, causing it to seize.
my sous vide set up with a bowl of tempered chocolate

After everything is in place, you can start dipping your little heart out. I’ve done this about a half dozen times now with beautifully consistent results. You do need to take care not to accidentally drop a strawberry (or whatever) into the water bath because it could splash water into your tempered chocolate.
chocolate-dipped strawberry

letting the chocolate set and applying a decorative drizzle of white chocolate

I also tried this on candied orange peels with outstanding results in a fraction of the time it used to take me. Not only is it so much faster to dip the orange peels, but I wind up with zero orangettes whose chocolate is streaked or bloomed because it had fallen out of temper. While this isn’t a sous vide chocolate tempering method, it does utilize the sous vide cooker to help the home cook manage small batch chocolate tempering with far more ease. I freaking love it. This application alone makes the sous vide worth every penny to me.
my orangette work station

setting on silpat

ready to be bagged and sent as gifts

I used to psych myself up before a big candymaking session that involved tempered chocolate because it required so much time and effort to keep the chocolate in temper. Now, I find I am no longer intimidated by the process because I know that once it is in temper, the sous vide bath method keeps it in temper until the chocolate is used up. This turns projects like chocolate-dipped strawberries into a joy rather than a chore. So if you have a sous vide (or can borrow one from someone), whipping up some fancy tempered chocolate treats for special occasions, holidays, or your mother is that much easier.
long stem strawberries make dipping much easier

and they’re pretty

simple, sweet, and elegant
Technique: Sous Vide Tempering Chocolate
[print recipe]
Set up the sous vide: Fill the sous vide bath vessel with water (not full – you will have to account for displaced volume of your bowl of tempered chocolate) and afix the sous vide device in one corner. Set the temperature to 91°F for dark chocolate or 87°F for milk or white chocolate. Make sure your bowl (that will contain your chocolate) will fit in the bath and can be secured to the side of the vessel.
Tempering dark chocolate: For the seed method of tempering, place all but 10 chocolate chips or chocolate pieces in the top of a double boiler or in a large heatproof bowl over a pan of simmering water (about 2 inches deep). Make sure the bowl is wider than the pan because you don’t want water getting into the chocolate or all of it will seize. Stir until the chocolate has melted completely, monitoring the temperature of the chocolate. When it reaches 112°F, remove the bowl from the water bath (it will continue to rise – that’s fine because we are targeting a final temperature of 118-120°F) and set it on an ice pack or a larger bowl of ice to start cooling it. Stir the chocolate constantly to promote proper cocoa butter crystal formation for tempering. Continue to monitor the temperature. When the chocolate reaches 95°F, remove the bowl from the ice pack or ice bath and toss in the chocolate chips. This is called seeding and should encourage the formation of good crystals for tempering. Keep stirring until the chocolate reaches 91°F. Secure the bowl of tempered chocolate to the side of the sous vide tub, making sure the chocolate in the bowl is below the water level outside of the bowl.
To temper milk or white chocolate: Follow the directions above for dark chocolate except milk and white chocolates should target a high temperature of 116-118°F (remove from hot water bath at 110°F), seeding at 95°F and perhaps again at 90°F, and they are in temper between 85 and 87°F. You must use high quality white chocolate – any white chocolate that uses palm kernel oil or coconut oil won’t temper (it will separate and be unusable).

more goodness from the use real butter archives

|
strawberry pate de fruits |

|
candied orange peels |

|
chocolate truffles |

|
chocolate-dipped key lime pears |

May 11th, 2017 at 5:34 am
Your cooling rack idea is ingenious (upside down strawberries w/ stems hanging down) — love!
I would happily eat anything anyone made me that included tempered chocolate — I’m just glad there are people with 1) the patience and 2) the desire to do this!
PS. I would be the one to drop the strawberry into the water. ;-)
May 11th, 2017 at 7:01 am
I love your blog! I know you keep this blog for yourself, but it has led me to cook so many things I’d never have thought to try. This technique is a great example. Thank you for sharing your ideas with the rest of us!
May 11th, 2017 at 11:16 am
Totally agree with Stephani (above)…we had “your” pork chops last night! As always your photos are amazing! Tempering isn’t on my to do list, but I appreciate you sharing your expertise.
Hope your Trail Ridge Road trip was fun. They should be working feverishly to clear it by Memorial Day. I hear it is open to bikers.
May 11th, 2017 at 1:47 pm
Brilliant! I can’t wait to do this next time I have to temper chocolate.
May 15th, 2017 at 6:00 pm
had no idea there was so much involved with this technique! Thank you for outlining the seed method and distinguishing it from the sous vide method, and for outlining the temperature ranges, even the tip about internal heat of the chocolate continuing to heat! Very useful set of information!
May 21st, 2017 at 6:48 pm
Bette – I totally dropped a strawberry in the water, which is what prompted me to add that warning :)
Stephani – Aww, you’re very welcome!
Jill – Thanks, friend! Glad you enjoyed the pork chops. Always looking for the juiciest possible version ;) And I wonder how much the most recent storm put the Park Service back on their schedule to open the road??
Sarah – Yay!
Sabrina – I’ve always been looking for a foolproof method and this one seems to work best for me, but the sous vide bath to keep it in temper is like the ULTIMATE :)
December 4th, 2020 at 5:47 pm
So, I love the idea of using the sous vide for tempering chocolate but I have some bad news for you: 1) Your chocolate is NOT in temper. I can tell just by looking at how dull it is. It should be shiny. 2) Don’t use baking bars for anything but baking. Use couverture. This has a higher amount of cocoa butter and will melt beautifully.