100 days
 Recipe: strawberry brown butter tarts
We were at the intersection of ALL THE GOOD THINGS this past weekend. It snowed 2 feet at our house which meant: 1) BIG DUMP SNOW DAY! and 2) hours of shoveling dense spring snow. Jeremy says it combats what our friend calls “professor arms”. But the whole reason for shoveling is so you can get to work or… go backcountry skiing! It’s like a warm up before you exercise some more. Plus, it justifies a little indulgence later on.
like this adorable tart

I logged my 100th day on skis this season over the weekend. Considering the paltry snowfall during our prime ski months, I’d say that’s not too shabby. It wasn’t my main goal to become a triple digit girl, just to keep active and fit through the winter. And to get outside often. It has been good for my body and mind, but most of all it has been excellent for my soul.
shoveling out from 2 feet, but it was worth it

jeremy breaks trail in the high country

an hour before sunset

sunday ski with banjo (and erin)

perfect weather, great snow, excellent friends

What I loved about our weekend storm was how it stayed cool and lightly stormy for several days after the 2 feet fell. That helps to solidify the snowpack so it will stick around longer, ski longer, water the mountains longer. It also makes for cozy evenings with warm blankets and Kevin Spacey. This weather is conducive for baking, too.
While recently digging through old photo archives, I came across a series of wildflower photographs from Big Sur about four years ago. Flowers flowers flowers and then – a strawberry tart. Actually, it was a strawberry brown butter tart from the Big Sur Bakery and it was the most heavenly pastry I had tasted in a long time. I think everyone needs a strawberry brown butter tart in their lives. This one starts with a flaky, buttery crust.
flour, salt, sugar, lemon juice, butter, ice water

place the flour, sugar, salt, and butter in a food processor
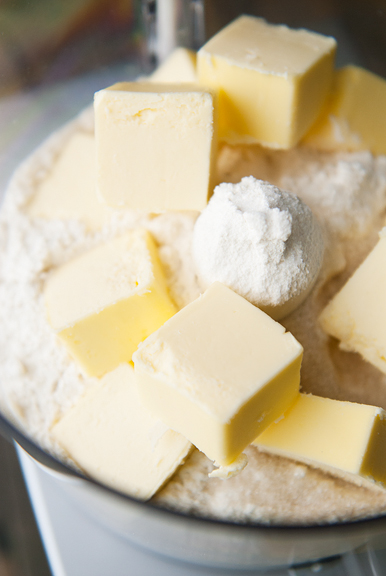
pulse until the butter is the size of small peas

combine lemon juice and ice water

add liquid until the dough is just combined

wrap and refrigerate

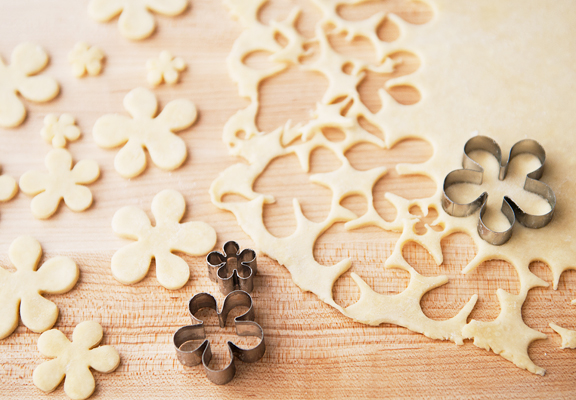
When you’ve made the dough, you should chill it for at least a half hour before rolling it out. I let mine sit in the refrigerator overnight and I imagine you could let it sit for a couple of days until you’re ready to bake the tarts. I used 4-inch diameter removable bottom tart pans with 2-inch sides. Actually, they are advertised as 2 inches high, but they’re closer to 1.5 inches. I don’t recommend going any smaller in diameter or shorter in height or else your pastry to filling ratio will be too high (I know this because I tried it). The original recipe uses the larger ball of dough for the bottom crusts and the smaller ball of dough for the decorative lattice. Since I didn’t want a lattice top crust, I cut my dough circles from both balls (four from the larger, two from the smaller) and used the scraps for cutting out cute little flowers. It just meant I didn’t have to re-roll the scraps. Do what works best for your final tart decorating vision.
roll out the chilled dough
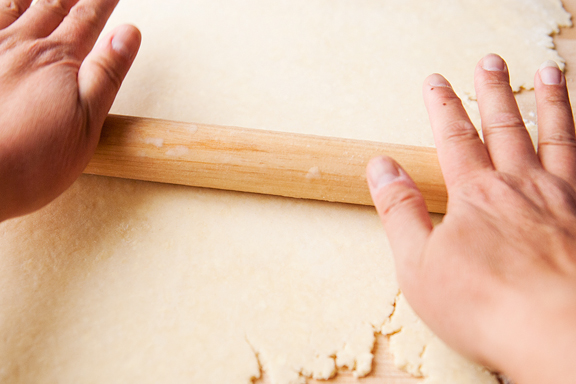
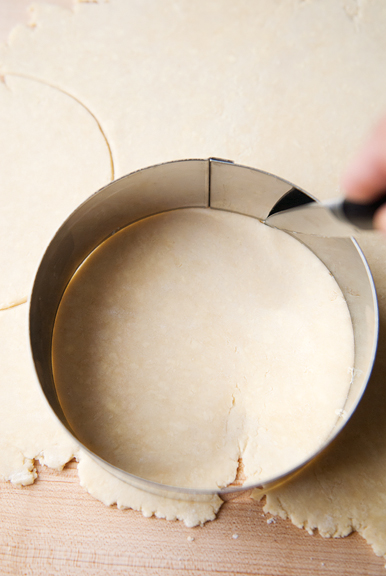
cutting the base circles
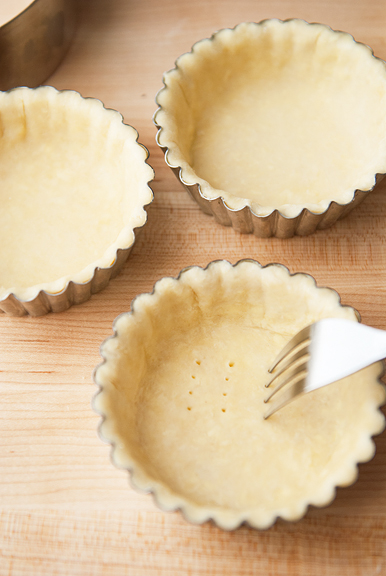
lining the tart pans
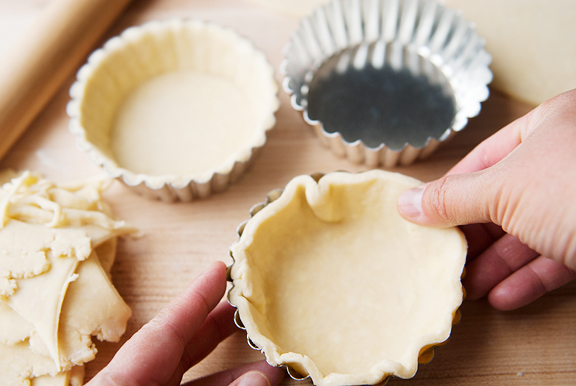
docking the bottoms
cutting out top crust decorations
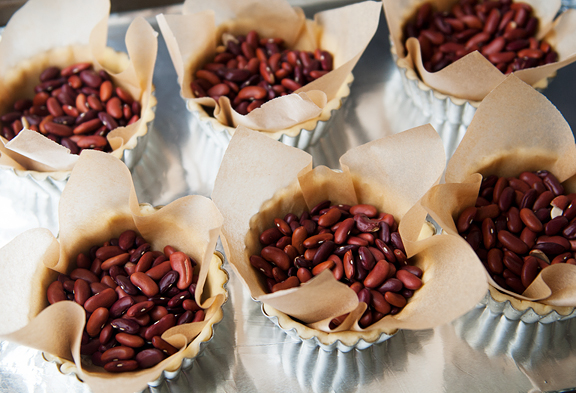
blind baking
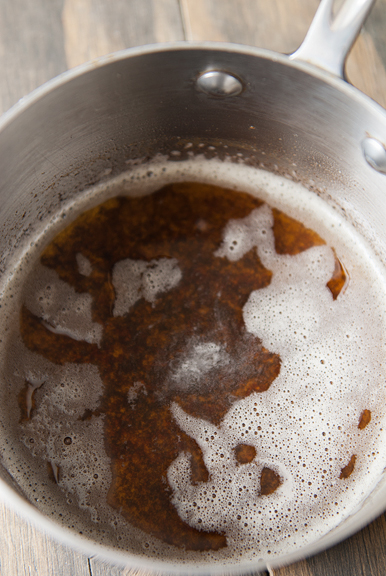
Some experimentation went into the filling. I wasn’t sure if I wanted fresh fruit in the tart or more of a jammy cooked strawberry filling. In a side-by-side taste comparison, Jeremy and I both agreed that that fresh fruit version was far superior. That said, you can always use jam (even store bought) if you can’t get ahold of fresh fruit and it will still be delightful – just not as amazing. The jam version is more like a bakewell tart. A word on browning the butter. If you haven’t done it before (which, I hadn’t until now), I find it helps to stir the butter while the solids brown. The first time I browned the butter and didn’t stir, it resulted in browned solids stuck to the bottom of my pan. On the second go around, I gently stirred the butter as the solids browned and not only did they not burn to the bottom of the pan, but I think the browned butter smelled better (more browned and less burnt).
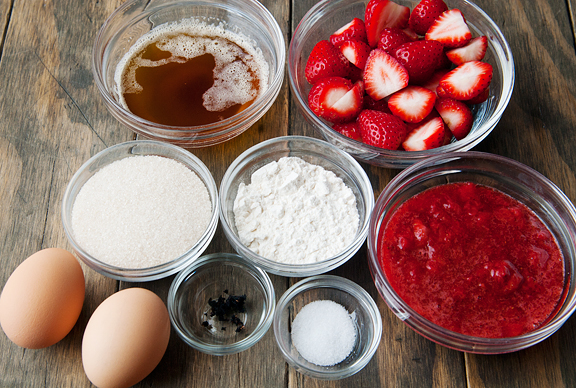
filling: sugar (ignore the second bowl of sugar), eggs, flour, salt, vanilla bean, butter, strawberries

browned butter
prepped (you can ignore the bowl of strawberry filling)
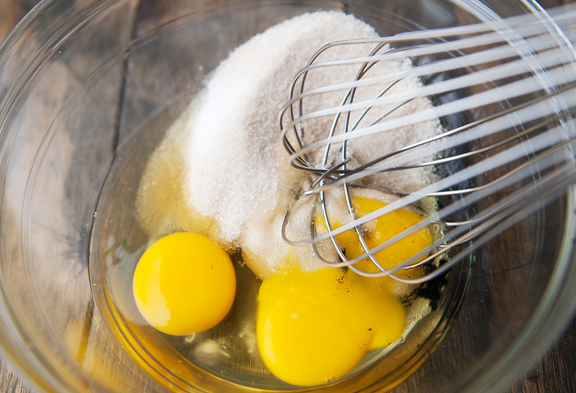
whisk the eggs, sugar, salt, and vanilla together
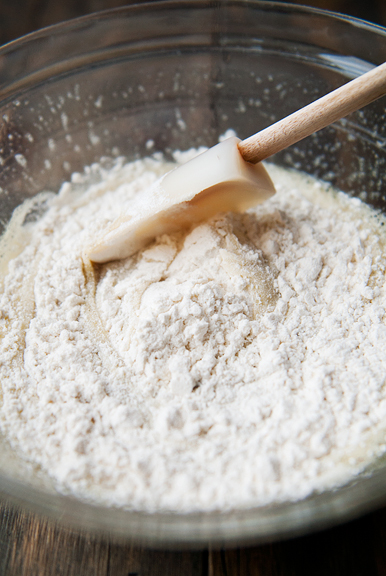
fold in the flour
whisk in the browned butter

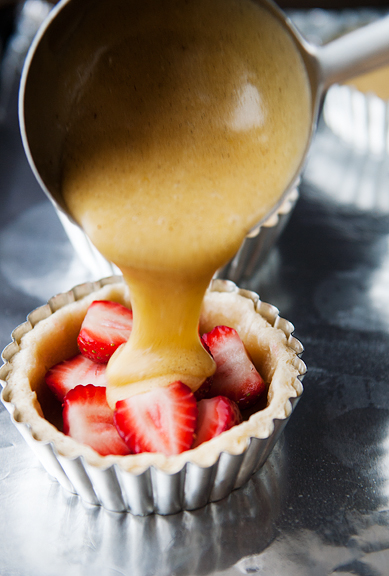
When you blind bake the pastry crust, there will be shrinkage. That’s okay. I found that I had less shrinkage with dough that had been rolled out once versus dough that had been re-rolled from scraps. Fill the tarts with fruit to the top of the crust, then pour the batter over the fruit. For aesthetics and ease of removal, only pour in enough batter to just cover the fruit or go to the edge of the crust. If you don’t care what the final tart looks like or if you don’t mind prying the stuck edges from every little fluted edge of the tin, then fill it to the top. Your choice. Overfilling the batter does two annoying things: 1) it sticks like crazy to the tart tin which can be problematic if it seeps down between the base crust and the tin’s sides and 2) it sometimes covers up the crust top, obliterating the pretty design. If you pour just enough batter to cover the fruit, then the colorful fruit juices will bubble up and contrast nicely with your crust top. You’ll also have an easier time popping the tarts out from the bottom.
first run: fresh fruit and jammy filling
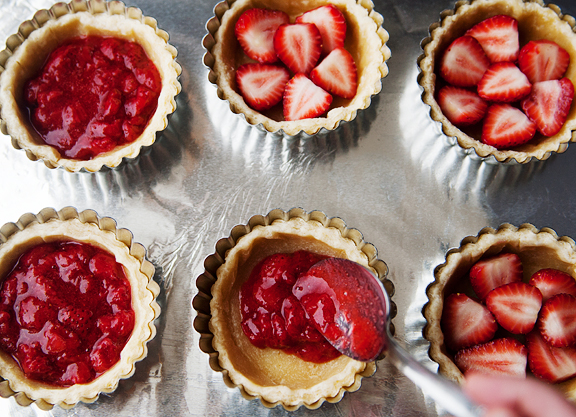
fill with the batter
decorate with crust top
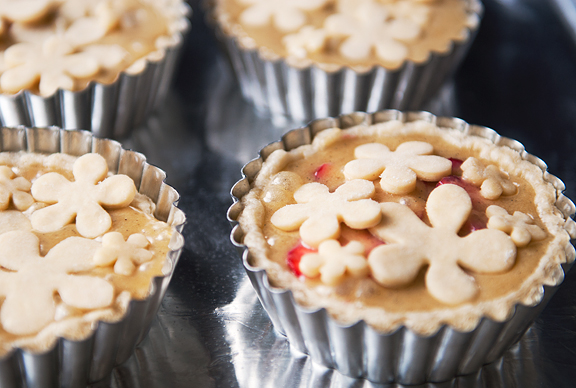
baked and cooling (cool completely before removing from tart pans)

So were these strawberry brown butter tarts as good as the one I had in Big Sur? No. They were BETTER. The fresh fruit really makes it extra scrumptious, so this is the time to take advantage of fresh strawberries. The original recipe calls for blueberries and I think any berry or stone fruit (peach, plum, cherry) would work beautifully. And with Mother’s Day just around the corner, I think this would put a big smile on Mom’s face.
fresh fruit and jam versions
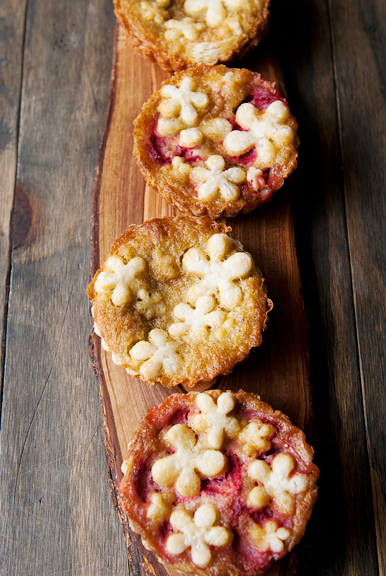
the fresh fruit tarts are more colorful
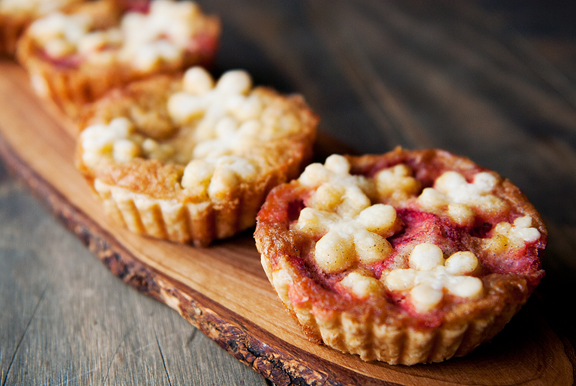
now i don’t need to go to big sur to enjoy a strawberry brown butter tart
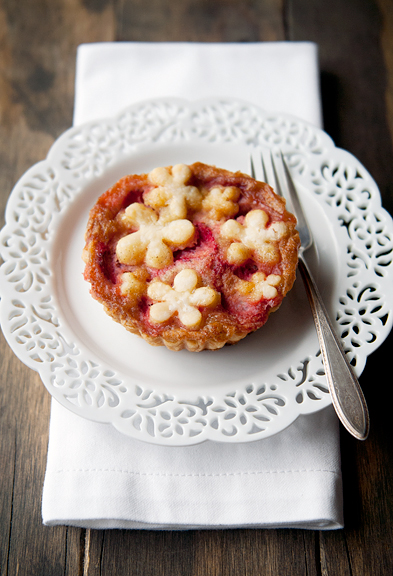
Strawberry Brown Butter Tarts
[print recipe]
from Dessert First
crust
2 cups (250 g) all-purpose flour
1 tsp salt
1 tbsp granulated sugar
1 cup (8 oz. or 225 g) unsalted butter, very cold and cut into 1-inch pieces
1/2 cup (120 ml) ice water
1 tsp lemon juice
filling
1/2 cup (4 oz. or 115 g) unsalted butter
2 large eggs
1/2 cup (100 g) granulated sugar
1/2 tsp vanilla bean paste (or seeds scraped from 1/2 vanilla bean or 1/2 tsp vanilla extract)
1/2 tsp salt
1/4 cup (30 g) all-purpose flour
12 oz. fresh strawberries, hulled and cut into halves if small, quarters if large
Prepare the dough: Place the flour, 1 teaspoon salt, 1 tablespoon of granulated sugar, and 1 cup of cold butter pieces in a food processor fitted with the metal blade. Pulse until the lumps in the mixture resemble small peas. Combine the ice water and lemon juice in a vessel. Pour a little ice water at a time into the flour mixture while pulsing the dough to incorporate the liquid. Stop when the dough just starts to come together. Divide the dough into 2/3 and 1/3 portions, wrap in plastic and chill in the refrigerator for at least 30 minutes.
Make the crusts: Roll the dough to 1/4-inch thickness on a lightly floured work surface. Cut out six 6-inch circles from the dough. Line six 4-inch diameter by 2-inch high tart tins (with removable bottoms) with the dough circles. [If you aren’t planning a crust topping that requires a continuous sheet of dough like me, then you can roll out both rounds of dough to get your crust circles, and use the leftover scraps for your topping shapes. This reduces the need to recombine scraps and re-roll the dough.] Prick (dock) the bottoms of the crusts with a fork several times. Place the tins in the refrigerator for 20 minutes. Cut the rest of the dough into desired shapes for the topping and refrigerate.
Brown the butter: Melt the butter in a small saucepan over medium-high heat. When the butter is melted and begins to foam, gently swirl or stir the butter. As the solids begin to brown (this takes a few minutes), continue to stir. You don’t HAVE to stir, but I found it helped keeping the solids from burning (and sticking) to the bottom of my pan. When the solids have browned and the butter takes on a golden color and starts to smell nutty, remove from heat.
Make the batter: In a medium bowl, whisk the eggs, 1/2 cup granulated sugar, 1/2 teaspoon vanilla bean paste (or whatever you’re using), and 1/2 teaspoon salt together until foamy. Sprinkle the flour over the mixture and gently fold in until incorporated. Whisk in the brown butter.
Make the tarts: Preheat oven to 350°F. Line each tart dough with parchment paper and fill with pie weights (I used dried beans). Bake for 15 minutes. Remove from oven and let cool. Remove the pie weights and parchment paper. Leave the oven on. Divvy up the strawberries among the tarts. Pour the batter over the berries until the berries are just covered. Distribute your pastry cut-outs over the tops of the tarts. Bake 25 minutes until the tops are browned. Remove from oven and let cool completely before removing from pans (you may need to loosen the edges with the tip of a sharp knife if the filling bubbled over the crust). Makes six 4-inch tarts. Should keep for up to 2 days in an airtight container.

more goodness from the use real butter archives

|
strawberry cinnamon rolls |

|
strawberry semifreddo |

|
strawberry buttercream macarons |

|
roasted strawberry ice cream |


April 20th, 2015 at 11:50 am
Both tarts look gorgeous and I’ll definitely devoured both, too delicious looking!
April 20th, 2015 at 4:15 pm
So cute, these are lovely!! :)
April 20th, 2015 at 5:45 pm
Wow, that looks delicious and pretty. I am not crazy about sweets in general and can’t take a lot of them, but this attracts me. I’d love to have one right now with a cup of good coffee.
April 21st, 2015 at 5:38 am
You had me at “two feet of snow”. ;)
April 21st, 2015 at 5:48 am
These sound so good. I would never have thought to combine strawberries and browned butter! Time to make a trip to the baking store and get some tart pans & a Scooby Doo flower cookie cutter! Should I finally cave and get a madeline pan as well?
April 21st, 2015 at 6:49 am
These look amazing! I’m going to try my hand at them this weekend!
April 21st, 2015 at 7:09 am
I have a girly pool party every summer …. floating, sipping wine and indulging in yummy things. This will definitely be on the line-up! Perfectly pretty!
April 21st, 2015 at 8:23 am
Kevin Spacey?
Darn that Banjo is a cutie pie.
xo, j
April 21st, 2015 at 1:35 pm
Congratulations on logging in your 100th day on skis this season. That is quite an accomplishment. And these tarts. . .they are so cute. I love the dainty little flowers you topped them with. Yeah to Big Sur photos for inspiring you to bring this to us. Pinned for future gawking and hopefully baking.
April 22nd, 2015 at 9:54 am
Thank you for this recipe. I can’t wait to make these for my next months book club! They’ll be a big hit for sure!
April 22nd, 2015 at 8:07 pm
More important than any of this – although very enticing – when is the puppy coming?
April 27th, 2015 at 2:09 pm
Jasline – thank you!
sara – they’re as good as they are cute :)
Lisa – I brought you one from Colorado.
farmerpam – right??! :)
Kristin – you’ll be one ahead of me! I have not yet made the plunge for madeline pans.
Jodi – I hope they worked for you!
Genia – mmm, what lucky pool ladies.
jill – House of Cards.
Lynn – thanks!
Ellen – :)
Kath – you’ll know when she’s here!