baked oats green chile chicken enchiladas chow mein bakery-style butter cookies


copyright jennifer yu © 2004-2023 all rights reserved: no photos or content may be reproduced without prior written consent

archive for February 2018

discards for the win

Sunday, February 25th, 2018

Recipe: sourdough waffles

Our floor lamp in the great room is on an automatic timer. I generally try to have it come on a little after sunset, when the skies give up their light at the end of each day. We’ve been doing this “chasing the sun” schedule for nearly 13 years now, but I still feel a boost of giddiness when I get to start setting the timer for later each day. It’s not that I don’t love winter, because I do love it very much. I just think with a little over 3 weeks left of official winter, I’m looking forward to spring backcountry skiing, longer days, and hopefully some big ass spring storms to replenish that high country snowpack. In the meantime, we are dutifully logging our ski days as best as we can. And Neva is definitely happier for it.


little neva lives for the dog-friendly nordic trails

happiest pup on the planet


When I first read the care and maintenance instructions for my starter, Wheatley, I thought there was a typo. It said to take a small fraction of the starter, feed it, and discard the rest – either in the trash or the compost, but don’t pour it down the sink as it could grow and clog up the pipes. Discard? Food? I soon understood that keeping it all would be an exercise in madness. In an effort to reduce waste, I began to take the very smallest fraction (5 grams) of starter for feedings before bread-making and save the discard in the refrigerator for things like delicious, fluffy waffles.

starter discard

flour, starter discard, eggs, butter, baking soda, salt, sugar, buttermilk


Waffles and pancakes are a great way to use up discard or unfed starter. This recipe uses a cup of discard and easily doubles if you want to freeze waffles or pancakes for quick breakfasts on weekdays. It does require a little planning, which may present difficulty for the non-planners, but the rest of you will be just fine. The night before you make waffles (or pancakes), stir the discard, buttermilk, flour, and sugar together in a large bowl. Cover the bowl with plastic wrap and leave it on the counter overnight at room temperature. That’s called the sponge.

combine the discard, flour, sugar, and buttermilk

cover with plastic and let sit out overnight


**Jump for more butter**

you bet your boocha

Monday, February 19th, 2018

Recipe: kombucha (plain, ginger, huckleberry ginger)

Happy Chinese New Year! The house has been cleaned, dumplings eaten, luck symbol hung upside down on the front door (translates to “luck arrives”), parents called, and red envelopes delivered to young friends. A low-key lunar new year celebration was just right for me, mostly because my February has been dedicated to fermentation. In addition to making delicious breads from my sourdough starter, I am also brewing kombucha!

Kombucha is fermented sweet tea. My motivation for brewing my own kombucha (booch) was more curiosity than anything else. I like the stuff, but drank it infrequently because it can become a spendy habit. Yet, kombucha is ridiculously easy and inexpensive to make. The only “exotic” component is the scoby, which stands for Symbiotic Culture of Bacteria and Yeast. Think of it as the equivalent to the mother for making vinegar. You can purchase scobys (try a local homebrew supply store or go online), get one from a friend, or make your own. Once you have a scoby, you’re set (unless you kill it – don’t kill it).

I got my scoby from my buddy, Erin (Canyon Erin), who grew hers from its infancy and split one off for me with some starter tea. I named it Scooby. Scobys are weird, ugly, and a little gross looking – at first. After brewing a few batches, you will come to love your scoby(s) like a pet. It feels rubbery and slippery, and all manner of random things float untidily off of it in the tea. But the scoby is what transforms plain old sweet tea into magical, fizzy, slightly alcoholic (less than 1%), tangy kombucha.


meet scooby, my scoby


Making kombucha is easy. I’m on my fourth batch now. The long instructions look daunting, but that’s only because the instructions are for newbies so they don’t kill their scoby. It basically comes down to: make sweet tea, stir in starter tea, slide the scoby into the tea, cover, ferment, bottle, carbonate, refrigerate. But there are tons of additional notes that go with that list.

I use purified water because our municipal water is chlorinated (I checked the town water quality report online) and chlorine can kill your happy bacteria. I read from a bread baker discussion that you can leave the water out on the counter for a day and the chlorine will evaporate because it’s rather volatile. So there’s that. For my first batches of kombucha, I stuck with organic black tea. Plain black tea works well. You can use other teas like green teas or white teas or a combination of teas, but avoid flavored teas – especially ones with added oils. And I make the sweet tea with organic granulated sugar. Please, people, don’t use artificial sweeteners. You will starve your scoby because it requires real sugar. The sugar is not for you, it is for the fermentation process. The starter tea comes from the previous batch of kombucha. If you bought or were given a scoby, it should have come in some starter tea.


sugar, black tea, scoby, purified water, and starter tea


The first step to making kombucha is to brew sweet tea. Boil your water, stir in the sugar until dissolved, and then drop your tea bags or loose tea in. Let the tea steep until the liquid has come to room temperature because hot tea is going to kill your yeasts and bacteria. If you are in a hurry, you can set your pot of tea in an ice bath to cool it down faster, but I prefer to leave mine in a cool part of the house for a few hours. My climate is quite arid, so while the tea is cooling I cover the scoby with a bowl or slip it into the starter tea to prevent it from drying out.

adding sugar to the boiled water

steep the tea until the water cools to room temperature

remove the tea bags (or strain the loose tea)


**Jump for more butter**

all the dough in the world

Tuesday, February 13th, 2018

Recipe: sourdough bread

Last week felt like proper winter for once. We had two powder days, cold temperatures, and great skiing on the mountain and the Nordic trails. I had almost forgotten what a real ski season is like! A real ski season is like butter. Smooth, silky, fluffy, cold, snowy butter…


jeremy grabs some powder runs before a meeting

hello winter, nice of you to come by!


It was also the perfect time to be experimenting with bread baking and running a hot oven. Baking sourdough bread has been on my List of Stuff and Things for over a decade. My greatest impediment was my fear of the unknown. You mean you have to CARE for sourdough starter? As in, keep it alive?!? How many times do we put off doing something because we can’t seem to overcome the activation energy (mental or otherwise) required to get going? And how many times, after we finally get around to doing it, do we kick ourselves for not doing it sooner now that we know it wasn’t such a big deal after all? I do not possess enough hands to raise for all the times I psyched myself out of awesome things, but I am learning that sometimes we need to simply get out of our own way.
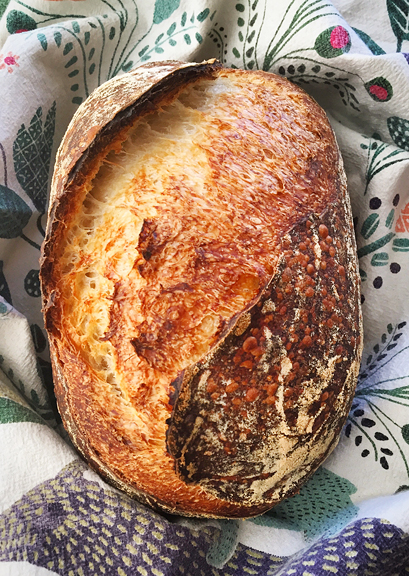
i baked some bread


Over the last couple of years I’ve admired my friend, Dawn, as she cranked out artisan pizzas, breads, pastries, and a host of other goodies. She grew and milled her own wheat! Dawn is one of my real life girl crushes because she’s badass and wonderful and rescues abandoned pups in the mountains left for dead by jerks. So it made sense that I would ask her for some sourdough starter in the hopes that her awesomeness would accompany the starter into my kitchen. In the last two weeks, I’ve given starter and Dawn’s Starter Care Guide to two other friends. Bread is for sharing! Once I saw how straightforward it is to feed and maintain my starter (I named it Wheatley) without killing it, I went in search of a sourdough bread recipe. My absolute favorite sourdough comes from Tartine Bakery in San Francisco and the recipe I used from The Kitchn is adapted from Tartine’s method, but for the home baker.

sourdough starter, water, water, flour, flour, salt


It blows my mind just a little (okay, a lot) that you can transform water, flour, and salt into a deep golden loaf of perfection. Whether you purchase, receive, or make your own sourdough starter, what you have in your jar is wild yeast that requires regular feeding. Feeding basically means stirring in equal weights of water and flour. [Note: While some may insist that I’ll have to pry their measuring cups from their cold dead hands, a kitchen scale eliminates the inaccuracies of volumetric measurements.] As the little yeasties digest the sugars in their food and produce energy by the process of fermentation, they create byproducts of carbon dioxide and ethanol. The carbon dioxide forms bubbles in your starter. That’s how you know it’s alive and active.

If you don’t feed your starter, it will eventually die. This was my biggest hangup with baking sourdough bread – was I going to kill my starter? Thankfully, you don’t have to babysit your starter daily if you don’t want to or are unable to. The lower temperature of the refrigerator slows the metabolism of the yeast such that a single feeding can sustain the organisms for a week or more. And if you are going to be away from your starter for longer than a few weeks, you can always make a backup. But a healthy and active starter should probably hang out on your kitchen counter at room temperature, receiving regular feedings for a few consecutive days, before making your bread. I typically feed my starter in the morning, and it is ready for use about 8 hours later.

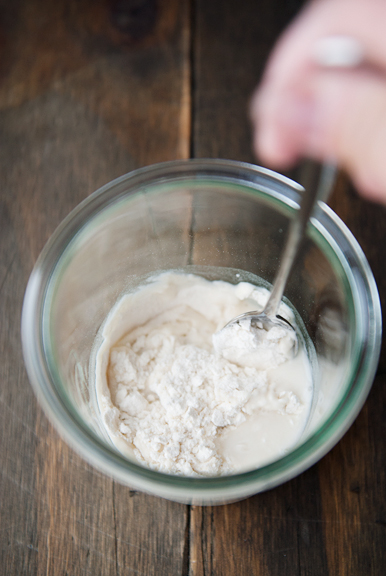
The recipe I followed makes two 1-pound loaves of sourdough and calls for one tablespoon of starter. I halved the recipe and used a half tablespoon or 8 grams of starter. The starter gets mixed with flour and water and is left to feed overnight. This is the levain (leaven) – the stuff that makes your bread rise. As our municipal water is treated with chlorine, I use purified water for the levain (there is always some leftover from my kombucha-making) as I don’t want to kill my baby yeasts. Alternatively, I could let my tap water sit out for a day as chlorine is pretty volatile and will evaporate naturally.


weighing the water for the levain

mixing the levain

bubbly the next day


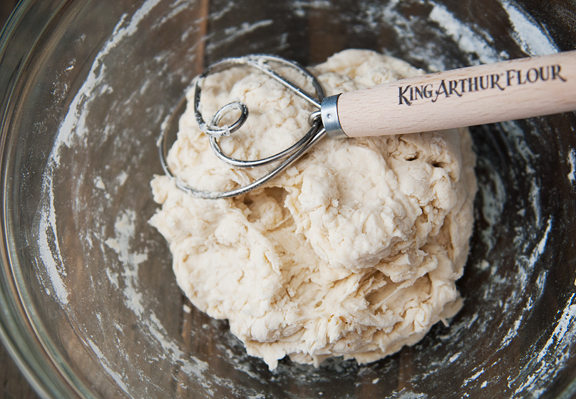
The levain should be bubbly and light and expanded the next day. I usually give it a sniff to make sure it’s a little sour smelling, a little alcoholy. Is it bad that I like sniffing sourdough starter? You can take a small spoonful of levain and drop it into water. If it floats, it’s ready to use. Stir the levain into the water until it is dissolved, then mix in the flour. You can use all-purpose flour or bread flour. I accidentally used all-purpose flour on my first attempt and then made sure to use bread flour on the second attempt. The bread flour dough was easier to work with, and I think the texture and flavor were better than the all-purpose flour loaf too. Also, if you have a Danish dough whisk languishing away in a drawer somewhere (like me), this is the perfect time to use it. It incorporates the flour so easily and quickly! The dough should look like a shaggy mess with no dry pockets of flour remaining.

Now let that shaggy mess rest for 30 minutes to 4 hours. This process, called autolyse, allows the flour to absorb the water and begins gluten development. I let mine rest for 4 hours (and went skate skiing on the local Nordic trails). And because I never know which factors of my kitchen (high altitude, cold, aridity, etc.) are going to impede my culinary endeavors, I cover the bowl with plastic wrap rather than a kitchen towel to prevent the dough from drying out, and I set the bowl atop the refrigerator where it is slightly warmer and out of Neva’s reach.


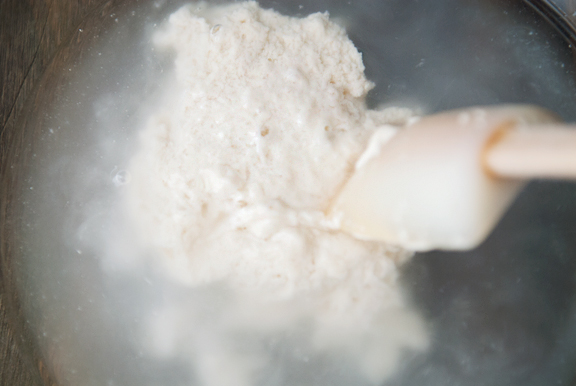
dissolve the levain in water
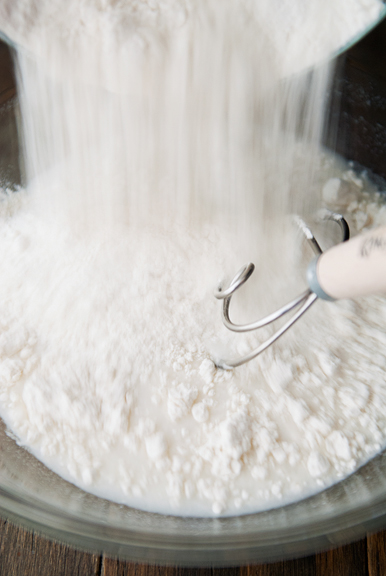
add the flour

mix it into a shaggy dough


**Jump for more butter**