


white and fluffy
 Recipe: huckleberry meringues
The Front Range got the goods this past Wednesday – 8 inches of snow to replenish our dwindling reserves in the mountains. Since then, our region has been hammered with several unseasonably warm and sunny days. Hey East Coast, I think we should arrange for a trade! Of course, you make due with what you get. I don’t wait for perfect conditions because I’d only get 3 ski days a year around here. I just pick the type of skiing that is best suited for the weather and snow conditions, and get myself outside. It’s all about exercise, the mountains, and fresh air. I do the same in summer, except without the skis.
powder in the glades

putting skins away

skinning up the side of the drainage

It almost felt like summer on Sunday. We skinned up into the backcountry through snow that was fast disintegrating into mashed potatoes, peeling off layers of clothes as the sun rose higher into the sky. Jeremy and I unzipped the side vents in our ski pants and I kept my long-sleeve top on for sun protection rather than for warmth. And this is early February. In the mountains. Above 10,000 feet. I chose this route because Erin was sick over the weekend and told us to ski tour without her. It’s a “No Dogs” trail, which means I would never ask Erin to ski it since No Dogs translates into No Banjo – and Banjo is my puppy buddy.
“It’s just as well,” I muttered to myself as I watched Jeremy make his way up the steepening valley headwall in front of me. The snow was crappy for ski touring and I had already taken Erin on a crappy ski tour the weekend prior (where there wasn’t enough snow). Since I convinced her to pick up skiing and sold her my old gear, I feel obligated to show her how awesome it can be on our local trails. Sadly, the conditions have been less than awesome. Like way less than awesome. But I need to give Erin more credit than that. She’s thrilled to get outside with Banjo to explore our lovely mountains by ski, no matter the lack of snow or overabundance of wind. Aside from Jeremy, Erin is the only person with whom I regularly hike and ski.
On the car ride home from last week’s ski tour, Erin told me she wanted to attempt making meringues. She had heard that our high altitude can cause problems. Was this true? I waved the question away. No, altitude hasn’t posed any problems for me. Meringues are easy. But I told her that I’ve been researching and obsessing over one kind of meringue – all based on a photograph – and I was going to experiment soon. I promised I would report back on my findings. You may or may not have seen the gorgeous giant billowy meringues made famous by Ottolenghi. I’ve actually been oblivious to them until I recently purchased Ottolenghi: The Cookbook. Flipping through, looking for savory vegetable recipes, an image of those signature meringues piled high on a cake plate grabbed my attention. What? How? I need to – they’re so beautiful!
frozen huckleberries, lemon, superfine sugar, more superfine sugar, eggs

egg whites, lemon juice, sugar, sugar, huckleberries

Ottolenghi’s raspberry meringues resemble giant dark pink and white variegated roses. I wanted to create those large cloud-like confections, but there were a few issues to address. First off, my meringues always wind up beige instead of white. Second, how does he apply the berry splatter without turning the meringues soggy? Eventually, with the guidance of this article based on Ottolenghi’s technique and some kitchen testing, I managed to create this obsession I’ve had for the past few months. For the sauce, I used frozen huckleberries (foraged from this past summer), but you can easily substitute fresh or frozen blueberries, raspberries, strawberries… pick your berry.
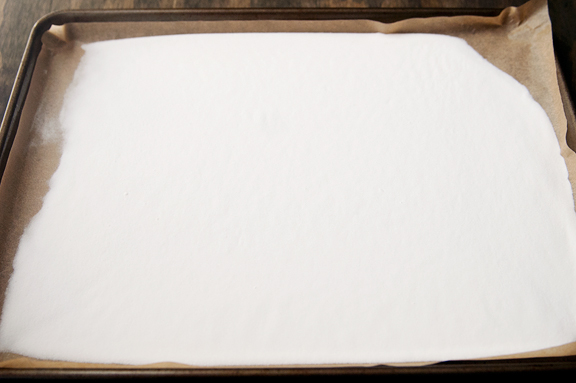
Use superfine sugar, because it will incorporate and dissolve into the egg whites faster than larger granules of sugar. Spread the sugar out on a parchment paper-lined rimmed baking sheet. You’re going to heat this up in a hot oven until it just starts to melt at the edges. When this happens, start whipping the egg whites in a stand mixer on high speed. You really want to use a stand mixer because these need to be whipped for 10 minutes. My arm hurts just thinking about whipping that by hand. You’ll need to move quickly (and carefully) and take the baking sheet out of the oven, lift the parchment (with the sugar) off the pan using oven mitts, and slowly pour the sugar into the whipping egg whites. The directions say not to let the sugar brown in the oven, but mine did a little bit (hey – photographing this stuff makes timing tough). It’s okay, but not ideal. I think if the sugar is liquid (hot), you can pour it into the egg whites, but if you have shards of hardened sugar, don’t add them to the mixer because they won’t dissolve. Also, pour the sugar in on the side of the bowl to avoid any unnecessary excitement. If you pour it directly onto the whisk attachment while it is running, you will have hot sugar flying all over your kitchen.
spread the superfine sugar on a parchment-lined baking sheet
start whipping the egg whites when the sugar begins to melt at the edges

a little too melty, but you get the point

pour the sugar into the egg whites

While the meringue is whipping away, turn the oven down to the lowest temperature setting. Somewhere in the neighborhood of 140°F to 160°F to keep the meringues white. I know for a fact that 200°F is too hot and will turn the meringues beige before they are done baking. When the meringue is cool to the touch (touch the side of the bowl, it should be cooler than your hand), spoon or pipe it onto a prepared baking sheet lined with parchment paper. Nominally, for the large meringues, you should get about 6-8 from one recipe. Space them apart with enough room between them as they will expand during baking. Pop those bad boys into the oven for about 4 hours (less time if you are making smaller meringues) or until the outside is hard and the base sounds hollow when tapped. Personally, I like the insides of my meringues to be slightly chewy. It’s hard to know what the heck is going on inside unless you break one open or have done this a dozen times. I broke one open and the inside was just slightly undercooked, which was perfect.
whipped

spoon onto parchment paper-lined baking sheet

leave plenty of space as the meringues will expand

fluffy cloud of sugar

While the meringues bake, you can make your berry sauce. It’s really simple – simmer the berries with some sugar and lemon juice until they start to give up their juices. You can either purée the sauce or run it through a food mill (finest setting) and then strain it through a fine-mesh sieve. I managed to squeeze 1/4 cup of sauce from the whole thing.
huckleberries, sugar, and lemon juice

simmer to release the juices

processing through a food mill

straining through a fine-mesh sieve

1/4 cup of sauce

When the meringues are ready, remove them from the oven and splatter or brush them with the berry sauce. Don’t be heavy-handed with the sauce because too much liquid will start to dissolve the meringue. Don’t be touching the sauced meringues either, because they will be sticky/tacky at this point. Put the meringues back in the oven and turn off the heat. Let the meringues dry out for an hour to set the sauce. When they are ready, the sauce should be dry to the touch and safe to handle.
remove the meringues from the oven when the shells are hard and bottoms sound hollow when tapped

splatter or brush the sauce on the meringues

after drying in the oven

I was so excited that these meringues didn’t tank. They came out of the oven light, delicate, beautiful. The low temperature maintained the white color of the meringues as well as the deep hue of the huckleberry sauce. Breaking one open, the outer hard shell shattered into large pieces, revealing the slightly chewy interior. If you like that texture, you will have to sacrifice a couple on your first go around to make sure the inside is done to your satisfaction. If you want them hard all the way through, then just bake until they are done. And while I’m not an enormous fan of eating meringues, I absolutely loved making these. Just imagine the smile on someone’s face when you hand them a homemade cloud of sweetness.
a pile of happy

almost too pretty to eat

Huckleberry Meringues
[print recipe]
based on this article from The Guardian and inspired by the meringues from Ottolenghi
300g (about 1.5 cups) superfine sugar
150g egg whites, at room temperature (about 5 large egg whites)
1-4 tbsps huckleberry syrup (recipe below)
huckleberry syrup
1 cup huckleberries (or use blueberries, blackberries, raspberries, or strawberries), fresh or frozen
1 tbsp sugar
1 tbsp lemon juice, fresh squeezed
Make the huckleberry sauce: Place the berries, sugar, and lemon juice in a small saucepan. Bring to a simmer over medium heat until the juices start to flow. Purée the contents or put them through a food mill on the finest setting. Strain the berry purée through a fine mesh sieve. Your yield should be in the neighborhood of 1/4 cup of liquid.
*Note: For the meringues to whip properly, it helps to have the egg whites at room temperature (not cold). Also, make sure your stand mixer bowl and balloon whisk are clean and free of any oil or grease. The oil or grease can prevent the egg whites from whipping properly.
Make the meringues: Preheat oven to 400°F. Line a rimmed baking sheet with parchment paper. Spread the sugar evenly over the parchment. Place the egg whites in the clean bowl of a stand mixer fitted with a balloon whisk attachment. Bake the sugar for about 8 minutes or until the edges begin melting (but not turning brown). As soon as the sugar begins to liquefy at the edges, turn the stand mixer on to its highest speed. The whites should be foamy as you remove the sugar from the oven. With oven mitts, lift the parchment paper with the sugar on it off the pan. Slowly pour the hot sugar from the parchment paper to the egg whites while the mixer is still running. It helps to angle the sugar toward the side of the bowl. If you pour the sugar onto the balloon whisk attachment, it will fling the sugar to all corners of your kitchen (and your hair). Continue to whisk the meringue on high speed until it is cool to the touch (about 10 minutes). It should be shiny, thick, and hold its shape.
Reduce the oven temperature to your lowest setting. We’re targeting 140°F – 160°F to keep the meringues from turning beige (I wanted to keep them white). Line another baking sheet with parchment paper. If the paper slides around on the baking sheet, you can anchor it by placing a little dot of meringue on the underside of each corner of the paper so that it sticks to the baking sheet. Spoon or pipe the meringue onto the parchment paper with an inch of space between each meringue (they will expand during baking). I went for the giant blob look this time. Bake the meringues until they are crisp on the outside and hollow sounding underneath when tapped with a wooden spoon. This took me about 4 hours for my giant meringues, but may take less time for smaller meringues, so you’ll have to keep an eye on them and test some sacrificial meringues.
Remove the meringues from the oven and drizzle, spray, splatter, or brush them lightly with huckleberry sauce. I used a silicone basting brush to apply a thin coat of sauce to the meringues. Don’t apply too much or the meringues will become soggy. Return the meringues to the oven. Turn off the heat. Let the meringues dry out for an hour. Remove from oven. The sauced parts of the meringues should be dry to the touch. Keep in an air-tight container or a dry place for up to 4 or 5 days. Makes 6-8 palm-sized meringues or several smaller meringues.

more goodness from the use real butter archives

|
huckleberry syrup |

|
huckleberry crisp |

|
eton mess |

|
the concorde: chocolate meringue mousse cake |

February 9th, 2015 at 5:12 am
I used to love picking huckleberries when I lived in Idaho! These look divine!
February 9th, 2015 at 5:41 am
Those are beautiful, and I love how that you research recipes so thoroughly. I hope you get some good snow this month!
February 9th, 2015 at 11:54 pm
Oh Jen…those are so beautiful! We are currently living in France, where we have become big meringue fans as it is what pretty much all the bakeries do with their leftover egg whites. There’s none here as pretty as yours though! Thanks for another recipe that I cannot wait to try.
February 10th, 2015 at 1:41 am
If only we could send you our snow, freezing rain and ice from here in the Buffalo area…… My gift from mother nature is both hands and wrists in pain from carpel tunnel…..from digging out endlessly. Skiers…..very happy! The rest of us…..not so much! :)
February 10th, 2015 at 7:48 am
Jen: Honey you can have all my snow! Given free and without ties.
These meringues look wonderful.
Have you something in the middle? A Couple in the photos look like you have sliced them and put filling in.
Have a Joyful Day :~D
Charlie
February 10th, 2015 at 11:08 am
Gosh, they look like those white roses that Alice in Wonderland was painting red, they’re so beautiful! Hey, have you ever told us how you got your start into skiing? Was it when you were a kid and got into ice skating first, followed by skiing, or did you only pick it up when you were older? I come from a country without snow and I don’t do cold well, so I’ll never ski, I think (plus I hear it’s a very expensive hobby/sport) but your passion for it is so contagious, I’m really interested what sparked the love. Will you write a post about it?
Best regards,
Jasmine
February 21st, 2015 at 9:06 pm
Tori – right? Huckleberries are the best! :)
Kristin – thanks!
Trisha – you’re so sweet, thank you!
Joyce – well, we’re a little choosy here in Colorado… we like the fluffy stuff, but not the rest of your wintry mix ;)
Charlie – ha ha! Nothing in the middle of the meringues. They expand and crack when they bake and the sugar can bubble in some places.
Jasmine – I learned to ski when I met Jeremy (I was 21). It is definitely an expensive sport, without a doubt. There are ways you can ski “on the cheap” but really it means “cheaper” than “expensive”. I think I really began to love skiing when I could do a lot of it (in Colorado) and when I switched from alpine to telemark. Not sure I’ll write a post about it, but maybe some day ;)
March 18th, 2015 at 2:29 pm
Will these get soggy with the huckleberry syrup on them?
March 20th, 2015 at 9:18 am
mariah – actually, they don’t. You apply the syrup after the meringues have baked for about 3 hours, then you put them in the oven to bake/dry for another hour. When they come out, the syrup is like a lacquer on the meringue and completely dry.