


something shiny
 Recipe: chocolate mirror glaze
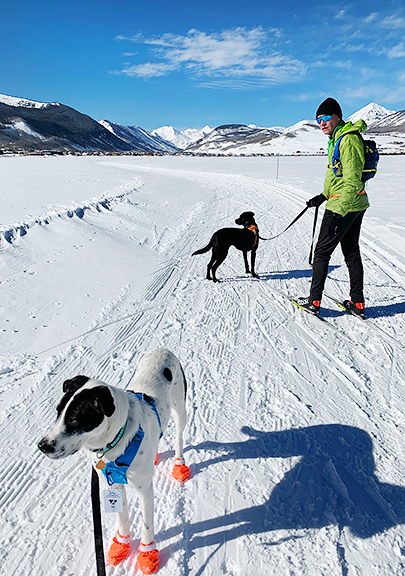
This past week in Crested Butte has seen a good bit of progress for Yuki. She improved her length of sustained running during our skate ski compared to the last few times when she would slow down, fall behind, and then STOP abruptly. We also took her on the mountain at the ski resort for her first uphill ski and she was pretty good despite so many new and loud distractions like ski patrol, snow mobiles, and large grooming machines. Yuki was a trooper through it all and it helped tremendously to have Neva present to show her there was nothing to be afraid of, but rather everything to be excited about. Crested Butte provides an excellent environment for dog activities with its consistent snow, designated dog-friendly Nordic trails, dog-friendly uphill policies at the ski resort, and good backcountry coverage.
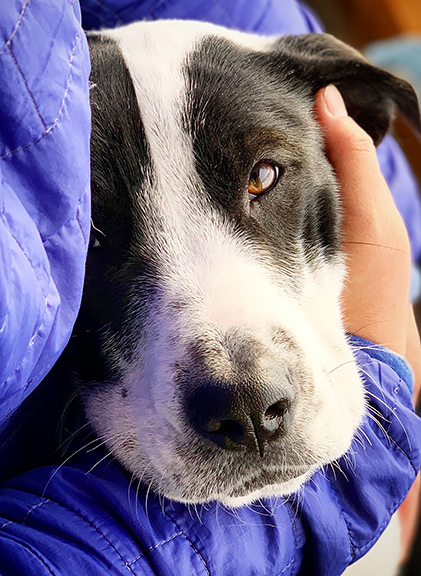
when it is -25°F outside, we stay home and snuggle until it warms up
enjoying the nordic trails on a bluebird day
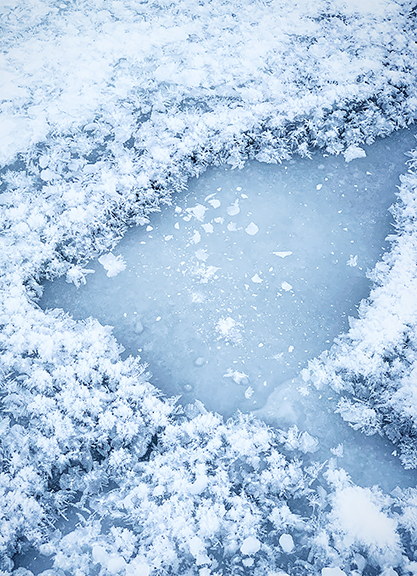
frost flowers form on the river when it is really cold and calm
skiing out after skinning up the mountain with the pups

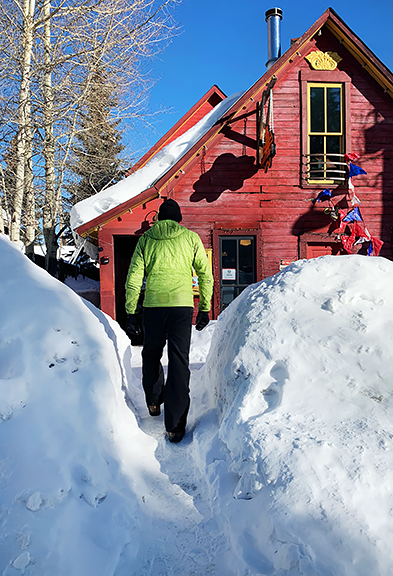
plenty of snow down in town
I see Valentine’s Day on the calendar this week and have absolutely zero plans except to possibly ski a powder day. Oh wait, I *do* have something for you all. Last September, I made a random chocolate raspberry mousse cake for Jeremy’s birthday and a few people had asked if I would post the recipe. I didn’t feel there was a recipe to post since most of the cake was made from components that have already been published on the blog. However, the chocolate mirror glaze was new, and that’s what I will discuss in this post. A glossy dark chocolate mirror glaze lends a nice wow factor to a dessert and is pretty easy to whip up. I’ll also go through the steps of my cake assembly, but the cake under the glaze can be (almost) anything you like.
The chocolate chiffon cake and the chocolate mousse recipes come from my chocolate mousse bombes recipe. If you plan to make the chocolate chiffon cake, I blogged the recipe for the hazelnut praline paste last week. In this example, I baked two 6×2-inch rounds of the chocolate chiffon cake and leveled the tops to give me two 1-inch layers of cake. This uses half of the chocolate chiffon cake recipe which can yield three 6×2-inch cakes (I had extra batter left over). I doubled the mousse recipe because I wanted enough mousse to form a half-inch layer around the cake and a thin layer on top of the cake. For raspberries, I had 3 cups of fresh raspberries for filling the mousse layer as well as garnishing the cake.
trimmed cake layers, raspberries, and chocolate mousse

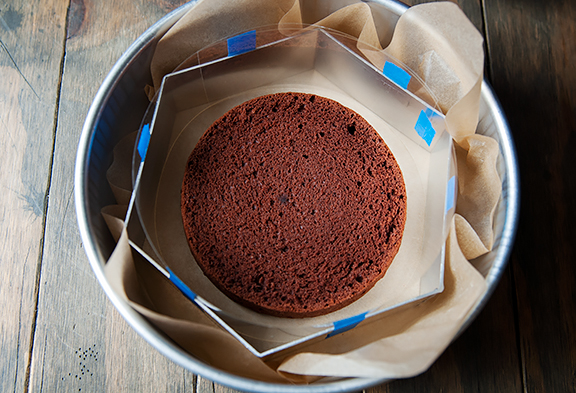
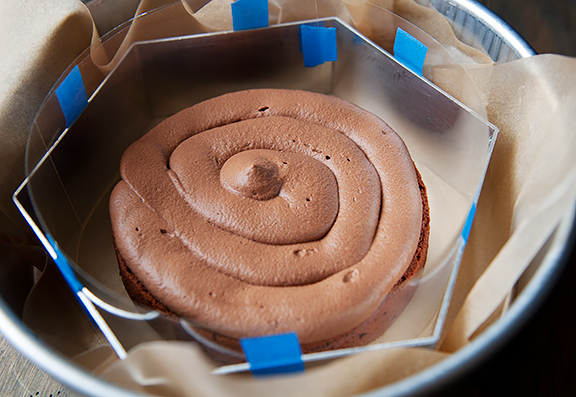
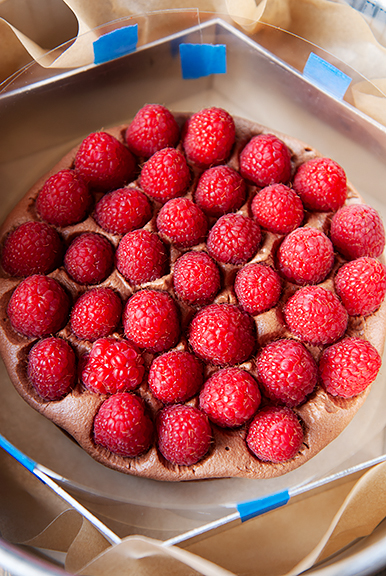
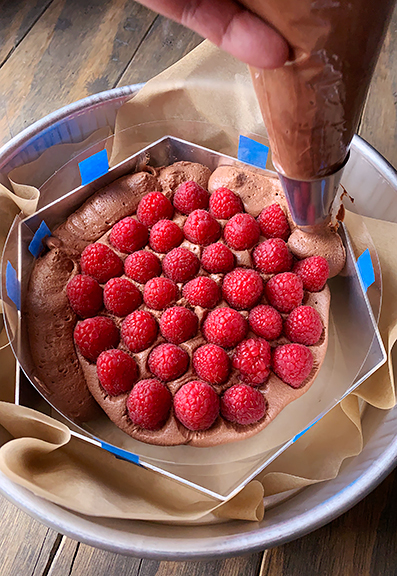
I couldn’t find a 7-inch ring mold anywhere in town, but managed to improvise one using an 8-inch (point-to-point) hexagonal ring mold whose side-to-side measurement was 7 inches. I taped a strip of 4-inch acetate in a circle around the inside of the mold and set it on parchment inside of a larger (9-inch) baking pan. I set the first cake layer down in the center (base to bottom), then piped mousse on top of it (piping makes it easier). I pressed the raspberries into the mousse, not worrying too much about mousse spilling over the edge since I was surrounding the cake with a mousse layer. Next, I filled the gaps between the cake and the acetate strip with mousse. In hindsight, I should have used a smaller piping tip because it is difficult to fill the tight spots, but it mostly worked.
center the cake in the mold
top with mousse
arrange the raspberries in the mousse
fill the sides with mousse to the raspberry level
The ensemble was topped off with another layer of mousse, then the second layer of cake went on, base facing up. I finished it all with a thin layer of mousse over the top cake layer and leveled the mousse out all around to the edges. Before placing the cake in the freezer to set, I put a sheet of parchment on the top to smooth and even out the mousse and to protect the mousse surface as it froze. I let my cake freeze overnight. It probably takes several hours for the whole thing to set properly as it is mostly mousse, which is not a rigid material except when frozen. I needed my cake to be frozen through so I could manhandle it without worrying about it coming apart or being crushed.
another layer of mousse

the second cake layer

finish it off with more mousse

place parchment on top to smooth and protect the mousse before freezing

Unlike a white chocolate mirror glaze which is a beautiful blank canvas for pretty much any color combination, the chocolate mirror glaze is limited in color. Unlike a white chocolate mirror glaze, the chocolate mirror glaze actually tastes good. To make the glaze takes less than 15 minutes, but to cool the glaze to the right glazing temperature requires an hour or more. I highly recommend using a thermometer to monitor when your glaze reaches 90°F.
water, sugar, vanilla extract, sweetened condensed milk, powdered gelatin, chocolate

stir the gelatin, vanilla, and a few tablespoons of water together

heat water, sweetened condensed milk, and sugar until just boiling

stir the gelatin mixture into the hot liquid until dissolved

stir in the chocolate until melted and smooth

strain any lumps out of the glaze and let cool

While your glaze cools, you can get a feel for how quickly its temperature is approaching the target. Give yourself enough time to unmold your cake and prepare it for glazing. I set my cake on a cylinder that has a diameter smaller than that of my cake (not too small though, as it increases the instability) by about 2 inches. That ensemble was set on a rimmed baking sheet to catch excess glaze drips. The excess glaze can be reheated and used again for other projects if it doesn’t have mousse or cake crumbs in it. When the glaze hits 90°F, it’s time to pour the glaze over your frozen cake or frozen whatever. Work quickly because the warm glaze on frozen anything means the glaze will thicken and begin to set in a minute or so, and when that happens anything you touch will lose its beautiful mirror-like quality. After the glaze has covered the sides completely (if that is your design – you can also use less glaze and go for “drip” effect), use a knife to tidy the bottom edge and add any garnish you were planning. You can let it set up in the refrigerator or freezer, but make sure not to touch the glaze in the process. Eventually, it will become dry to the touch (maybe an hour or more?) instead of sticking disastrously to everything.
remove the cake from the freezer

pour the glaze over the cake

clean the base of excess glaze

I made the mistake of cutting a slice while the cake was still frozen inside and the raspberries were hard as rocks. In general, after glazing, store the cake in the refrigerator. The best advice for cutting the cake is to bring it out of the refrigerator an hour before serving (30 minutes if it is warm out) and slice it with a warm knife (run the blade under hot water and wipe dry). It’s a beautiful result when done right and more importantly, it’s a nice chocolatey glaze that tastes as good as it looks. Go forth and glaze!
decorations on top

carefully transferred to a cake stand

a slice of chocolate raspberry mousse cake

Chocolate Mirror Glaze
[print recipe]
slightly modified from this recipe
140g dark chocolate, chopped
5g (1 tsp) vanilla
30g (2 tbsps) water
7.5g gelatin powder
120g granulated sugar
80g sweetened condensed milk
80g water
Place the chocolate in a medium heatproof bowl. In a small bowl, stir the vanilla, 2 tablespoons of water, and gelatin powder together into a thick paste. Set aside. In a small (or medium) saucepan, stir the sugar, sweetened condensed milk, and 80 grams of water together over medium heat, stirring to dissolve the sugar until the mixture begins to boil. Turn off the heat. Stir the gelatin paste into the hot mixture until dissolved. Pour the hot liquid over the chocolate and stir until the chocolate is melted and the glaze is smooth. You can use an immersion blender instead, but take care not to introduce many bubbles. Pour the hot glaze through a strainer to remove any lumps. When the temperature reaches 90°F, it is ready to pour (this takes about an hour or more). Makes about 1 3/4 cups of glaze. Leftover glaze can be reheated and reused. The glaze can also be frozen in an airtight container or packaging for up to several months. You can double, triple, quadruple, etc. this recipe as needed.

more goodness from the use real butter archives

|
cherry (ice cream) bombes |

|
sous vide tempering chocolate (technique) |

|
chocolate almond macarons (sucre cuit method) |

|
chocolate budino |

February 11th, 2019 at 5:52 am
That is absolutely gorgeous. I am glad to hear that the chocolate tastes good. I had tried to search around to see if mirror glazes tasted good, but no one seemed to mention the flavor, so I decided that it was all about the looks. Your frost flowers are beautiful, and I am glad that Yuki is doing so well with her new experiences.
February 11th, 2019 at 6:51 am
Your pups seem so very perfect for each other! Love hearing about their adventures and escapades.
February 11th, 2019 at 8:36 am
Now that is crazy beautiful! Enjoy all that beautiful CB snow. Your pack is in their glory! xo, jill
February 11th, 2019 at 10:29 am
I love all the mirror glazes on great British bake off. Now I have the instructions to attempt it myself. Thanks!
February 11th, 2019 at 11:28 am
This looks so great!
It is a needs must recipe.
I have a question though.
You put your wonderful recipes here for us to use.
Why aren’t we able to copy and paste?
I’m a very busy person and just don’t have the time to sit and copy the recipes out.
February 11th, 2019 at 11:33 am
Kristin – I was pleasantly surprised that it tastes good, too. I think if the mirror glaze is thin enough and the rest of the dessert flavors are bold enough, you could ignore the mirror glaze taste?
Cheryl – Thank you!
Jill – :) xo
Laura – They are really pretty on GBBO. I’m intrigued with the galaxy mirror!
Charlie – You can click on the [print recipe] link and it will send you to a PDF file that you can save.
February 11th, 2019 at 12:18 pm
The cake looks amazing. I might try my hand at it. Looking at your pictures, it appears that you make your own vanilla extract. Would you mind sharing with us how you make it as well?
February 11th, 2019 at 12:32 pm
Jen, please disregard my request above. I searched your site and found the vanilla bean paste & extract recipe. I’ll be making some soon!
February 11th, 2019 at 3:20 pm
What an absolutely STUNNING creation!
February 12th, 2019 at 3:13 pm
Wow, what a drop dead gorgeous cake! Thank you for the chocolate mirror glaze tutorial. I’ve never made a mirror glaze but I’ve always wondered about it.
February 18th, 2019 at 10:10 pm
Wow, this is gorgeous! What were all of the things used for decoration? I can tell there are raspberries, pistacios, and hazelnuts but having a hard time figuring out some of the other things.
February 20th, 2019 at 8:22 am
I’m going to try this recipe for my husbands birthday this week!
February 20th, 2019 at 8:32 am
Could you add a thin layer of hazelnut praline before the raspberries do you think for added crunch?
February 20th, 2019 at 10:09 am
Cynthia – Glad you found it! It’s so easy to make and I think it tastes and smells better than what I buy in stores :)
MK – Thank you, friend xo
Elise – Aw, you are the sweetest! I have wondered about mirror glazes for a while. When I made my first, it didn’t taste very good (but it looked gorgeous). At least with the chocolate mirror glaze it is both beautiful and tasty!
Leslie – The pink powder is powdered (and sifted) freeze-dried raspberries. The silver balls are silver dragees. Those are not edible. I mean, you can eat them, but you shouldn’t. They are decorations and I think the silver is bad for you to ingest. They sell them all over the place with cake decorations, but if you read the fine print, they say “decoration only”. I actually googled around and learned the FDA says they aren’t safe to eat (presumably because metals like gold and silver accumulate in your liver). It is illegal to sell them in California, but you can still find them in other states. I happen to have a jar of them from a friend who gave me all of her old food photography props. So I use them, but I don’t let Jeremy eat them. Hope that helps!
Cori – If you don’t pulse the praline paste into a smooth paste, it will still be crunchy and you could totally add a layer to the mousse or on top of the glazed cake. Or you could avoid making the paste and just crush the hazelnut pralines (so they look like large sand crystals) and sprinkle them inside or on top of or on the sides of the cake. Lovely idea!