baked oats green chile chicken enchiladas chow mein bakery-style butter cookies


copyright jennifer yu © 2004-2023 all rights reserved: no photos or content may be reproduced without prior written consent

archive for celebration

something shiny

Sunday, February 10th, 2019

Recipe: chocolate mirror glaze

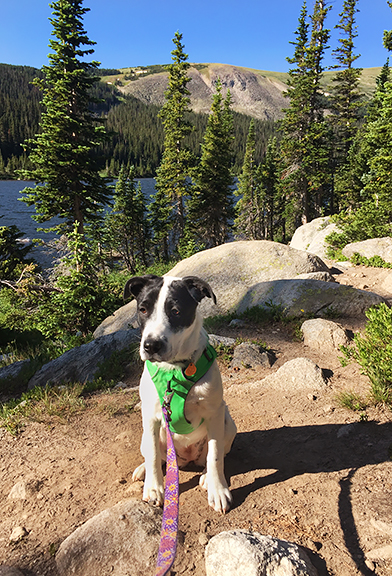
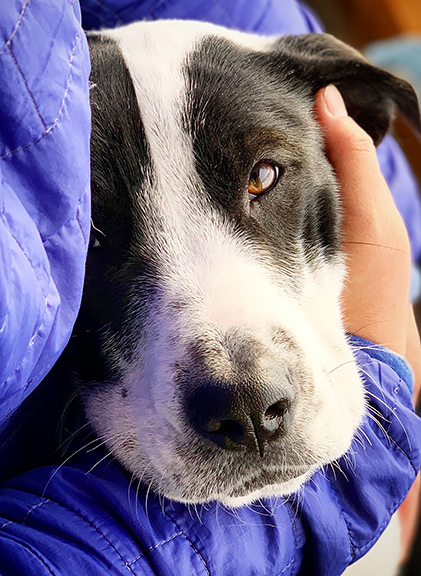
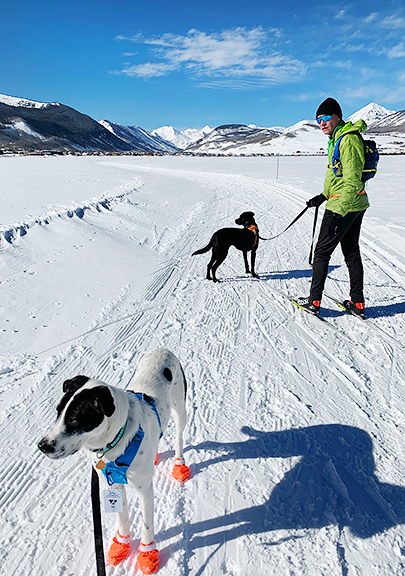
This past week in Crested Butte has seen a good bit of progress for Yuki. She improved her length of sustained running during our skate ski compared to the last few times when she would slow down, fall behind, and then STOP abruptly. We also took her on the mountain at the ski resort for her first uphill ski and she was pretty good despite so many new and loud distractions like ski patrol, snow mobiles, and large grooming machines. Yuki was a trooper through it all and it helped tremendously to have Neva present to show her there was nothing to be afraid of, but rather everything to be excited about. Crested Butte provides an excellent environment for dog activities with its consistent snow, designated dog-friendly Nordic trails, dog-friendly uphill policies at the ski resort, and good backcountry coverage.


when it is -25Β°F outside, we stay home and snuggle until it warms up

enjoying the nordic trails on a bluebird day

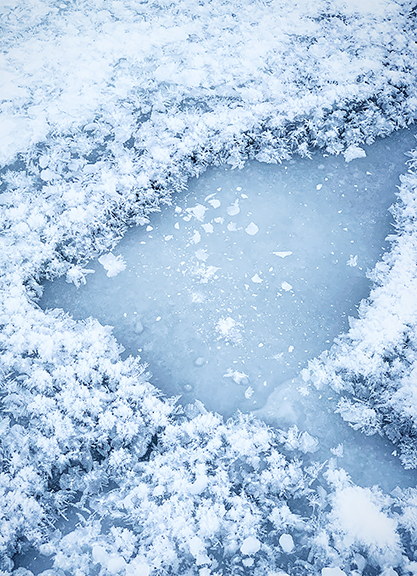
frost flowers form on the river when it is really cold and calm

skiing out after skinning up the mountain with the pups

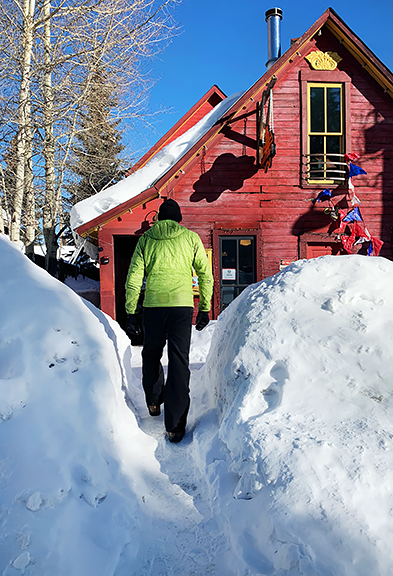
plenty of snow down in town


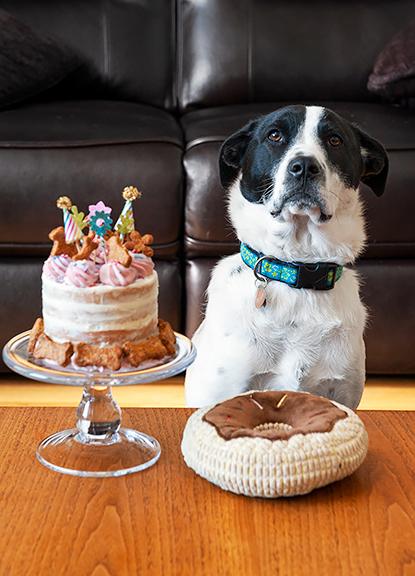
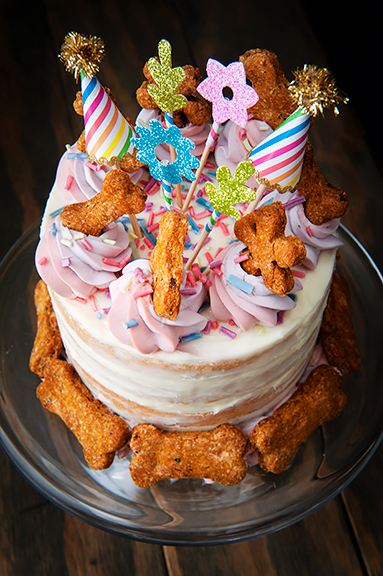
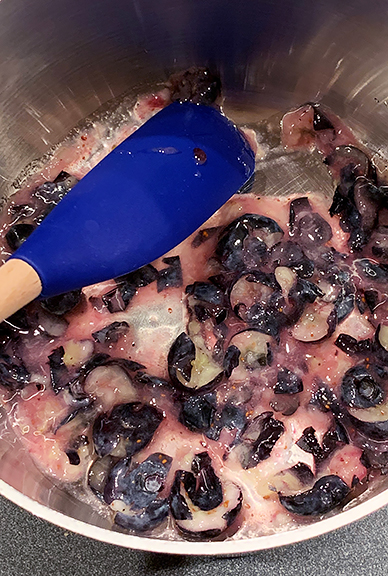
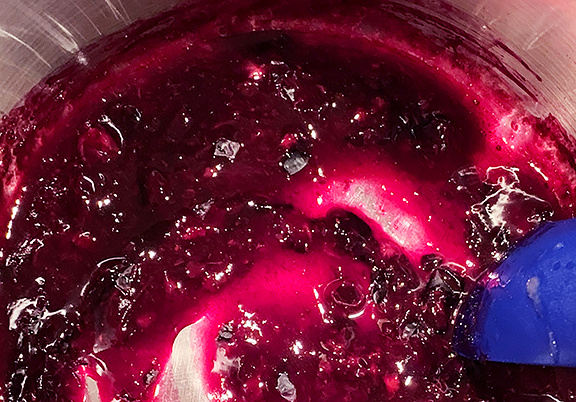
I see Valentine’s Day on the calendar this week and have absolutely zero plans except to possibly ski a powder day. Oh wait, I *do* have something for you all. Last September, I made a random chocolate raspberry mousse cake for Jeremy’s birthday and a few people had asked if I would post the recipe. I didn’t feel there was a recipe to post since most of the cake was made from components that have already been published on the blog. However, the chocolate mirror glaze was new, and that’s what I will discuss in this post. A glossy dark chocolate mirror glaze lends a nice wow factor to a dessert and is pretty easy to whip up. I’ll also go through the steps of my cake assembly, but the cake under the glaze can be (almost) anything you like.

The chocolate chiffon cake and the chocolate mousse recipes come from my chocolate mousse bombes recipe. If you plan to make the chocolate chiffon cake, I blogged the recipe for the hazelnut praline paste last week. In this example, I baked two 6×2-inch rounds of the chocolate chiffon cake and leveled the tops to give me two 1-inch layers of cake. This uses half of the chocolate chiffon cake recipe which can yield three 6×2-inch cakes (I had extra batter left over). I doubled the mousse recipe because I wanted enough mousse to form a half-inch layer around the cake and a thin layer on top of the cake. For raspberries, I had 3 cups of fresh raspberries for filling the mousse layer as well as garnishing the cake.


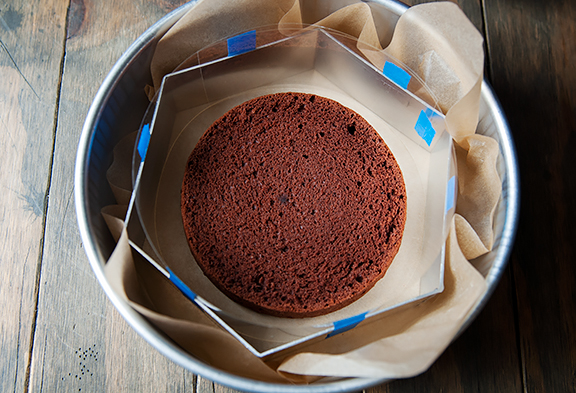
trimmed cake layers, raspberries, and chocolate mousse


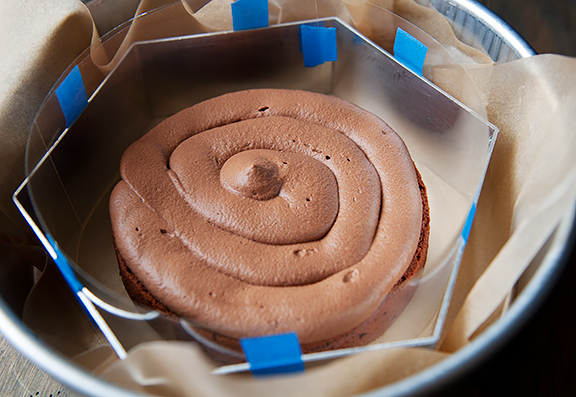
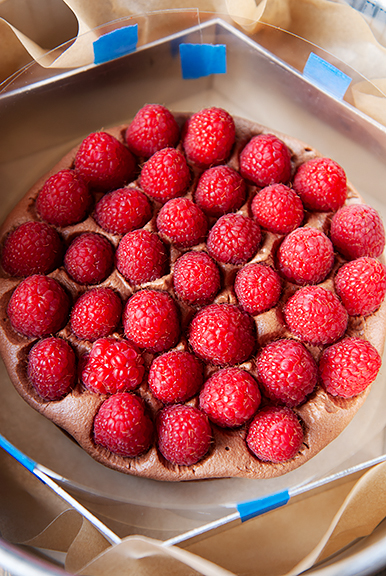
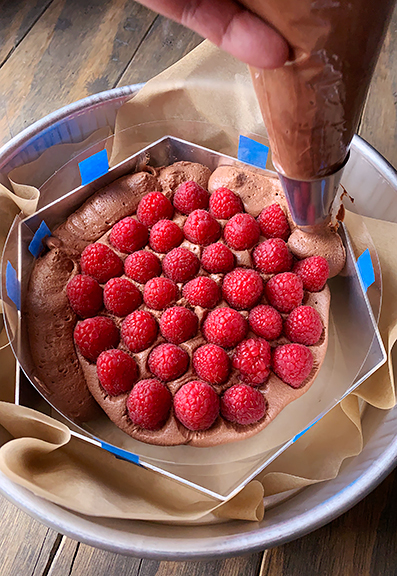
I couldn’t find a 7-inch ring mold anywhere in town, but managed to improvise one using an 8-inch (point-to-point) hexagonal ring mold whose side-to-side measurement was 7 inches. I taped a strip of 4-inch acetate in a circle around the inside of the mold and set it on parchment inside of a larger (9-inch) baking pan. I set the first cake layer down in the center (base to bottom), then piped mousse on top of it (piping makes it easier). I pressed the raspberries into the mousse, not worrying too much about mousse spilling over the edge since I was surrounding the cake with a mousse layer. Next, I filled the gaps between the cake and the acetate strip with mousse. In hindsight, I should have used a smaller piping tip because it is difficult to fill the tight spots, but it mostly worked.

center the cake in the mold

top with mousse

arrange the raspberries in the mousse

fill the sides with mousse to the raspberry level


**Jump for more butter**

yuki’s birthday!

Friday, February 1st, 2019

Recipe: naturally colored homemade sprinkles

Today is Yuki’s first birthday! I find it hard to believe that we’ve had her for seven months because I feel as if Yuki has always been a part of our lives. This little girl came into our home as a shy and timid puppy and has since blossomed into a happy, bouncy adventure dog. Wrapping my arms around Yuki when she jumped onto the bed this morning, I whispered “Happy Birthday, Baby Dog” and held on a little longer than usual. She looked me in the eyes and lifted her nose to mine, then gave me several soft kisses. I typically make a big deal out of my dogs’ first birthdays, but this one seems extra special, because Yuki’s path into our lives hinged on the kindnesses of so many good people and great organizations.


introducing a 5 month old yuki to our local mountain trails

i made her a birthday cake (and got her a stuffed doughnut toy)


How do we know Yuki’s birth date? When we adopted Yuki, Linda, her foster mother, handed me a folder with a couple of documents. These few sheets of paper contained all of the information Rezdawg Rescue gathered on Yuki’s first five months of her life. I spent a late night looking through the pages and searching the web to piece together her journey. From what I could tease out, Yuki had a vet appointment at about 2 weeks of age in western New Mexico with her mother in February. Around mid-May 2018, Yuki boarded her “freedom ride” transport with Rezdawg Rescue, leaving Ramah, New Mexico for Colorado where she was lovingly fostered for several weeks until we brought her home. That’s all I knew until late October.

After our Guess the Yuki contest, I posted Yuki’s DNA results and was contacted by K in Arizona, who said she had Yuki’s brother, Dakota. I assumed she was mistaken because I see A LOT of pups on rescue pages that look like Yuki. But K patiently shared details about Yuki and Dakota that matched up and filled in the blanks.

Yuki and Dakota’s pregnant, feral mama approached a stranger near Ramah, New Mexico in the winter of 2018. The kind-hearted man took her in and she gave birth to eight puppies on February 1. The man’s housemate and owner of the trailer lost patience and kicked the mama and her litter out into the snow. Distraught, our dear stranger contacted Black Hat Humane Society and another compassionate individual came to collect the family and fostered them on her small farm 10 miles away. At three and a half months of age, Yuki traveled north to Colorado. Dakota remained in Ramah and was adopted by K around the same time we adopted Yuki. And we are familiar with the rest of Yuki’s story (to date)!


handsome dakota (courtesy of k)


This time I went all out and created a special birthday cake for Yuki because I knew Neva would help her finish it. I made everything from scratch except for the little party toppers which I purchased because WHY NOT?! The cake is made with applesauce, banana, whole wheat flour, egg, and coconut oil. It tastes like sawdust with hints of banana and coconut, but the dogs LOVE it. The frosting is whipped cream cheese with just a bit of powdered sugar to make it more spreadable. The colored dollops are cream cheese with raspberry powder (pink) and blueberry liquid (purple). The decorative dog biscuits are a mashup of apple bacon cheddar dog treats and chicken sweet potato dog treats (I used pumpkin instead of sweet potato). And the sprinkles are homemade naturally-colored dog-safe sprinkles.

yuki’s 4-inch, 4-layer birthday cake

it’s a naked cake because the dogs don’t need that much frosting

yuki wouldn’t let neva any closer to the cake

cross-section

waiting to eat their slices

birthday caaaaaaaaake!


It all started when I was looking for sprinkles at the store. Being a child of the 70s, I consumed my fair share of artificial colors and flavorings, but I thought I could do better for my pups. So I put the cute and brightly colored sprinkles back on the shelf and decided to tackle those homemade sprinkles I had bookmarked the recipe for months ago. Those recipes also call for food coloring, however it is an easy enough tweak to substitute homemade natural food coloring. The basic concept is to make an icing with powdered sugar, egg white (powdered or fresh), and water. You can add a little extract to make the sprinkles taste good to humans, but my dogs couldn’t care less about the flavor. I started with a dry color (pink) and a wet color (purple).

powdered sugar, powdered egg whites, water, freeze-dried raspberries, thawed huckleberries


For the dry color, I pulverized freeze-dried raspberries. I think any freeze-dried red berry could work and it must be FREEZE-DRIED and not simply dried. Once it’s been powdered, sift it through a fine-mesh sieve. The reason for this is that any tiny bits of seed or fruit will clog up your piping tip when you pipe the icing and it’s maddeningly messy to unclog. For the wet color, I smooshed my huckleberries and strained the juice only to remember that it comes out hot pink in icing and not so much purple. Luckily, I had some blueberries on hand. Upon mashing them, I realized that blueberries give up their color when heated. I put them over medium heat until the juices turned purple and strained that liquid.

smash the freeze-dried raspberries

sift out the larger particles

smooshed blueberries

giving up their purple juices


**Jump for more butter**

cheeseboarding

Sunday, November 19th, 2017

Recipe: build your own cheeseboard

My parents did a lot of entertaining when I was growing up. It was something I was vaguely aware of as a little kid. Kris and I would belly flop onto my parents’ bed and watch television until we heard the adults move to the dining room for dinner. At that point, Kris would nudge me and say, “Come on, let’s go downstairs.” We’d sneak into the kitchen unseen by the guests (but always seen by Dad, who would flash us one of his goofy smiles as we tiptoed down the stairs) and nosh on whatever was left of the appetizers: smoked oysters, cheese, crackers, olives, caviar. Party food.

Mom and Dad still entertain to this day, so I found it amusing when Dad texted me last year asking what goes on a cheeseboard. He wanted ideas since I had plated a few during various dinner parties they had attended. I grabbed some photos from my archives as well as a handful off of Pinterest to give him some inspiration. When I threw Dad’s belated birthday party at our place last weekend, I made sure to kick it off with a nice cheeseboard because I know my Dad loves a cheeseboard packed with ALL of the goodies.

The holidays are upon us and that means party season is in full swing. Cheeseboards are a lovely way to get a dinner party started or to act as the workhorse for a cocktail party or to keep family and friends occupied as you rush to cook Thanksgiving dinner. If you are looking for ideas to spark your own cheeseboard artistry, I list and show some of my favorites here. There is enormous flexibility in cheeseboards, including not having any cheese!


neva wants to become an olympic cheeseboarder [note: grapes are toxic for dogs]


Let’s start with the actual board. The board can be a plate (porcelain, glass, etc.), slate, wood, whatever you like! Plates are the easiest to clean – especially if you serve things that are oily or messy directly on the board. And slate is great for writing the names of cheeses with chalk. I am partial to wood boards because of the beautiful natural colors and grain, which is why I have a lot of them. Some are gifts from my friend, Jamie, who is an incredibly talented woodworking artist. Occasionally, I use my largest Boos cutting blocks (24×18-inch walnut and 20×15-inch maple) because they give me the greatest surface area.

If you do have something oily like hot smoked salmon, and you don’t want the oils to soak into your nice wood boards (because let’s face it, once the board is out, it doesn’t get cleaned up until after the last guest leaves), you can slap a small plate underneath it to keep the fishy smells out of the wood. And remember, cheeseboards don’t have to be these gigantic cornucopias that can feed the whole neighborhood. Small cheeseboards for two are romantic. Medium cheeseboards for a cozy gathering of close friends work very well without being overwhelming. So don’t go crazy, but… you can go a little crazy.


you can serve on plates or slate

wood boards: an array of shapes, sizes, and designs


The fun part of cheeseboarding is picking out what to serve on your cheeseboard. It’s whatever you want it to be. I personally like the cheeseboards that don’t have much if any cheese because I don’t dig on eating cheese straight up. But I know the majority of my guests love cheese, so there is always at least one soft, one semi-soft, and one hard cheese. I also have friends who have Celiac disease, so I can either omit all gluten items (mostly crackers and breads) or plate those separately to avoid contamination of the gluten-free items.

Another nice thing about cheeseboards is that they can be as labor intensive as you like – or not! Just about everything can be purchased, but sometimes it’s nice to add your own personal touch. I always make my own crostini and I usually make those prohibitively expensive fruit, nut, and seed crisps unless I am slammed for time. Grissini happen to be quite easy to make at home, too.

I find fruit and fruity things pair well with various cheeses or act as a nice palate cleanser between nibbles. I don’t make my own fruit, but I do make my own fig and brandy jam every summer to serve with brie throughout the year. I have made membrillo, a delectable quince paste in the past to pair with manchego, but it requires a lot of work at my elevation, so I have resorted to purchasing it now that more stores carry it. In late summer, I love it when I can find good fresh figs. Lots of folks like figs with blue cheese and honey, but I tend eat them straight or with a little slice of prosciutto. Another crowd pleaser is baked brie with fresh cranberry sauce or fig jam or tomato jam. Goat cheese and jam is also a hit.


cheeses: aged cheddar, smoked gouda, brie, boursin, manchego

some gluten options: croccantini, brioche toasts, grissini, crostini, fruit and nut crisps, sliced baguette

fruity things: pomegranate, fig brandy jam, grapes, apple, membrillo


**Jump for more butter**