baked oats green chile chicken enchiladas chow mein bakery-style butter cookies


copyright jennifer yu © 2004-2023 all rights reserved: no photos or content may be reproduced without prior written consent

archive for entertaining

eye on spring

Tuesday, March 12th, 2019

Recipe: blood orange sorbet

Who is excited for spring? Normally I’d be giving you all the stink eye, but I think I know why I, too, look forward to the vernal equinox this year. It’s because we’ve had a really good and snowy winter. Some years we get shafted on a proper winter and the arrival of March sounds like parents telling kids they have to leave the amusement park after two hours of standing in line and not even getting on the ride. But this winter brought the goods!

The time change last weekend threw us for a little loop and now we are totally into it. The best part is the dogs don’t know about the time shift! They are sleeping later (not really, but yes) and not demanding dinner until much later. It’s fantastic. Also, we have rearranged our bedroom furniture so that Yuki sleeps in a (big) crate at night and Neva’s bed is next to the crate and gated off. Containing the dogs overnight makes ALL the difference between a good night’s sleep and walking around sleep-deprived with back aches and a crick in your neck the next day. Now they hop on the bed in the morning AFTER we have rested.


sometimes i find them napping together after a romp in the snow

yet another powder day


A storm is about to barrel down on Colorado, but I am feeling spring-ish. Blood oranges are in season winter and spring (depending on the variety), and I couldn’t help grabbing a bag at the store a few weeks ago. Maybe you only indulge in sorbet when the weather is hot, but I love it all year. Even if you think the cold weather negates making sorbet, I have good news: you can freeze the juice and zest (separately) until the weather grows hot enough to warrant, nay – DEMAND, a batch of refreshingly bright blood orange sorbet.

blood oranges, lemon, sugar, grand marnier, water

zest one of the oranges

juice the oranges


**Jump for more butter**

something shiny

Sunday, February 10th, 2019

Recipe: chocolate mirror glaze

This past week in Crested Butte has seen a good bit of progress for Yuki. She improved her length of sustained running during our skate ski compared to the last few times when she would slow down, fall behind, and then STOP abruptly. We also took her on the mountain at the ski resort for her first uphill ski and she was pretty good despite so many new and loud distractions like ski patrol, snow mobiles, and large grooming machines. Yuki was a trooper through it all and it helped tremendously to have Neva present to show her there was nothing to be afraid of, but rather everything to be excited about. Crested Butte provides an excellent environment for dog activities with its consistent snow, designated dog-friendly Nordic trails, dog-friendly uphill policies at the ski resort, and good backcountry coverage.


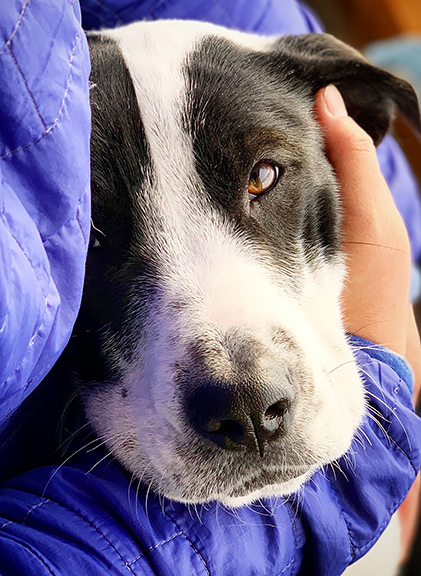
when it is -25°F outside, we stay home and snuggle until it warms up

enjoying the nordic trails on a bluebird day

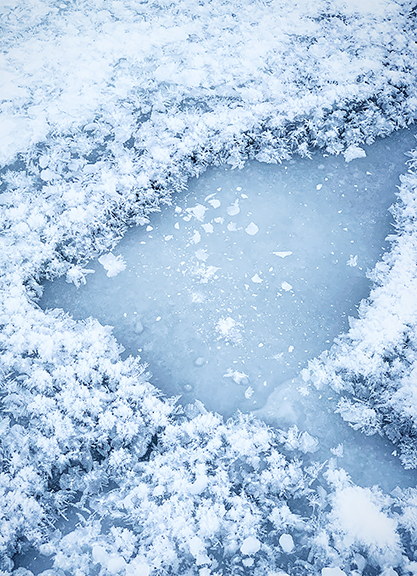
frost flowers form on the river when it is really cold and calm

skiing out after skinning up the mountain with the pups

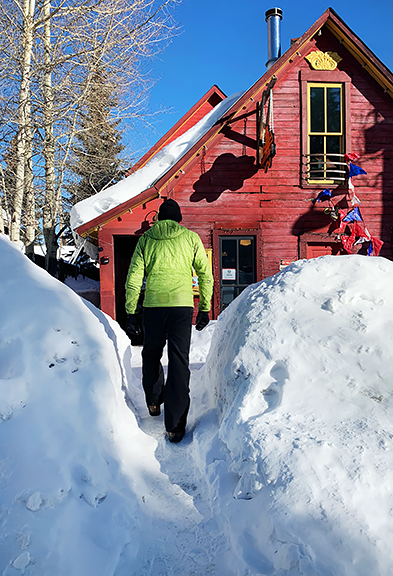
plenty of snow down in town


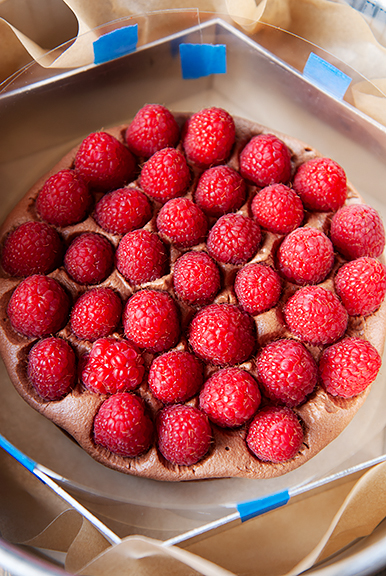
I see Valentine’s Day on the calendar this week and have absolutely zero plans except to possibly ski a powder day. Oh wait, I *do* have something for you all. Last September, I made a random chocolate raspberry mousse cake for Jeremy’s birthday and a few people had asked if I would post the recipe. I didn’t feel there was a recipe to post since most of the cake was made from components that have already been published on the blog. However, the chocolate mirror glaze was new, and that’s what I will discuss in this post. A glossy dark chocolate mirror glaze lends a nice wow factor to a dessert and is pretty easy to whip up. I’ll also go through the steps of my cake assembly, but the cake under the glaze can be (almost) anything you like.

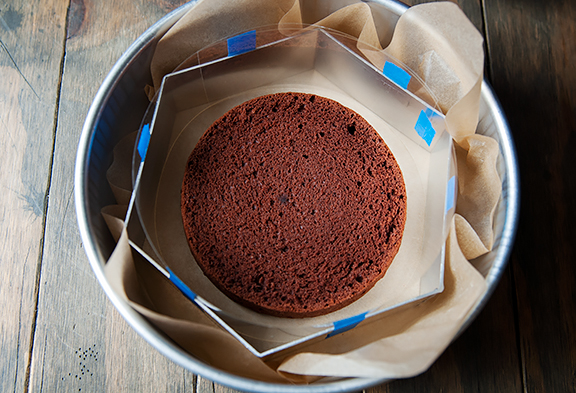
The chocolate chiffon cake and the chocolate mousse recipes come from my chocolate mousse bombes recipe. If you plan to make the chocolate chiffon cake, I blogged the recipe for the hazelnut praline paste last week. In this example, I baked two 6×2-inch rounds of the chocolate chiffon cake and leveled the tops to give me two 1-inch layers of cake. This uses half of the chocolate chiffon cake recipe which can yield three 6×2-inch cakes (I had extra batter left over). I doubled the mousse recipe because I wanted enough mousse to form a half-inch layer around the cake and a thin layer on top of the cake. For raspberries, I had 3 cups of fresh raspberries for filling the mousse layer as well as garnishing the cake.


trimmed cake layers, raspberries, and chocolate mousse


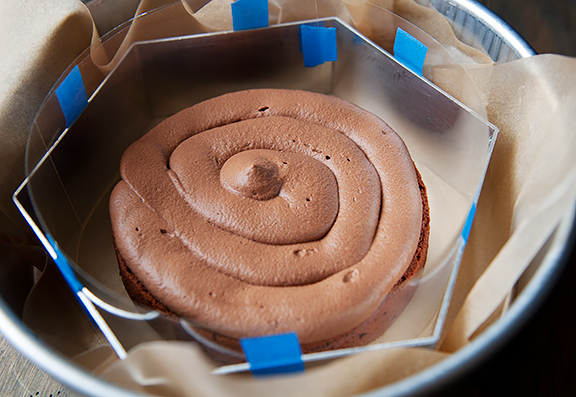
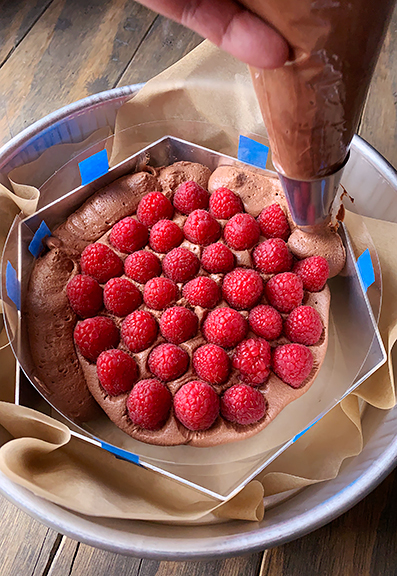
I couldn’t find a 7-inch ring mold anywhere in town, but managed to improvise one using an 8-inch (point-to-point) hexagonal ring mold whose side-to-side measurement was 7 inches. I taped a strip of 4-inch acetate in a circle around the inside of the mold and set it on parchment inside of a larger (9-inch) baking pan. I set the first cake layer down in the center (base to bottom), then piped mousse on top of it (piping makes it easier). I pressed the raspberries into the mousse, not worrying too much about mousse spilling over the edge since I was surrounding the cake with a mousse layer. Next, I filled the gaps between the cake and the acetate strip with mousse. In hindsight, I should have used a smaller piping tip because it is difficult to fill the tight spots, but it mostly worked.

center the cake in the mold

top with mousse

arrange the raspberries in the mousse

fill the sides with mousse to the raspberry level


**Jump for more butter**
nuts for hazelnuts!

Thursday, February 7th, 2019

Recipe: hazelnut pralines and hazelnut praline paste

I love the feeling of getting over the hump! My cold last month put me behind schedule on a few things that made the past couple of weeks a crush of work and deadlines that pushed up against Chinese New Year preparations. I managed to get it all done while sacrificing some sleep and exercise so we could leave for Crested Butte on the first day of the Chinese New Year. At least I did the “lucky” things for the Year of the Pig, which happens to be my year. Happy Chinese New Year, everyone! Now I can resume a normal pace of productivity and enjoy some time with my pack in the snow.


our spoiled pups enjoying their window benches in nederland

i kept the lunar new year celebration simple

taking advantage of a quiet powder day in crested butte

fluffy little stashes everywhere

yuki and neva as wind indicators


The recipe I’m sharing today came about through necessity. My first introduction to hazelnut praline paste occurred in my pastry skills program over a decade ago. It’s the kind of product you’ll find in the kitchens of professional bakers, candy makers, pastry chefs, pastry schools, and serious baking enthusiasts. Think of it as a rustic version of Nutella without any of the junk ingredients. Unable to find it in any local stores, my online search revealed hazelnut praline paste to be rather pricey unless I was willing to buy 11 pounds of it (I am not). I wondered aloud how hard could it possibly be to make my own? Apparently, not hard at all.

lemon juice, sugar, raw hazelnuts, water


Most people would probably substitute Nutella or skip the praline paste altogether, but I have a deep love of the stuff. I’d spoon it straight into my mouth if my adult brain didn’t override my 1970s child instincts. Hazelnut praline paste has a rich, smooth texture and a buttery, toasted nutty, burnt sugar flavor. To make it requires caramelizing sugar, coating the hazelnuts in the hot caramelized sugar, cooling the pralines, and then blitzing it to a paste in a food processor. While the process steps are simple, the technique requires some competency with caramelizing sugar. I even managed to brick a batch of hot sugar before remembering that a touch of acid (in this case, lemon juice) can help prevent seed formation during caramelization, especially at high altitude. One thing to note is that I usually use organic cane sugar, which is light brown, but I used white sugar in the photographs because I wanted to show it turning amber in color.

combine sugar, lemon juice, and water in a small saucepan

let it boil undisturbed until it turns deep amber


**Jump for more butter**