baked oats green chile chicken enchiladas chow mein bakery-style butter cookies


copyright jennifer yu © 2004-2023 all rights reserved: no photos or content may be reproduced without prior written consent

tough and easy

February 11th, 2015

Recipe: porcini butter

Today (Wednesday) was my last day of my 6-week skate ski program. While I will miss meeting up with this fine group of women and my awesome instructor, I have to say I’m happy to get my Wednesdays back. That, and I look forward to not being completely wiped out at the end of a long day of skate skiing and drills. I signed up for this program to jump start my introduction to skate skiing. On the registration form, I was asked to mark my ability level, so I checked off “Green: Beginner”, because that’s what I was. Little did I expect to be grouped into the intermediate class. I came into this program with the willingness to work hard, but this level of instruction required even more than I had anticipated.

So I worked. Hard. It wasn’t enough to just show up to class once a week, I needed to practice several times between classes so I could improve and take full advantage of the instruction I received. In the beginning it was crazy frustrating trying to piece together all of the elements of the technique while being completely exhausted from the hills. But I stuck with it as punishing as it felt, and within a couple of weeks I noticed some improvement. I am by no means what I consider a proficient skate skier, but I feel like I can practice and skate toward that goal equipped with the knowledge and understanding that our instructor shared over the last month and a half.


my wonderful skate gals


After a day of skating up and down the hills at Eldora, it’s necessary to come home to an easy menu. I’ll tell you what, though – I think easy menus are perfect just about any time. We gave up going out to dinner on Valentine’s Day over two decades ago, opting for a delicious home-cooked meal in the privacy of our own home. This spared us the headache of having to jostle among crowds of couples with unreasonably high expectations for the evening. When I tried this recipe, my intention was to shoot for “easy”. Only after sitting down to eat our dinner, did I realized how a simple porcini butter could transform a meal into a swoon-worthy experience.

The name, porcini butter, is practically the recipe itself. It requires dried porcini mushrooms and butter – a match made in heaven. If you are using unsalted butter, you can opt to add salt. I personally hold off on adding salt because I like to add it separately. Unlike fresh porcini, dried porcini are mush easier to find in grocery stores if you don’t have your own. They are usually packed in 1 oz. bags or containers. The butter should be at room temperature so you can cream it easily with a fork. Use a spice grinder or a mortar and pestle to turn the porcini into a fine powder. Everything will start to smell of porcini at this point.


you’ll need: salt (optional), butter, dried porcini

cream the butter

place the dried porcini in a spice grinder

grind it into a powder


**Jump for more butter**

white and fluffy

February 8th, 2015

Recipe: huckleberry meringues

The Front Range got the goods this past Wednesday – 8 inches of snow to replenish our dwindling reserves in the mountains. Since then, our region has been hammered with several unseasonably warm and sunny days. Hey East Coast, I think we should arrange for a trade! Of course, you make due with what you get. I don’t wait for perfect conditions because I’d only get 3 ski days a year around here. I just pick the type of skiing that is best suited for the weather and snow conditions, and get myself outside. It’s all about exercise, the mountains, and fresh air. I do the same in summer, except without the skis.


powder in the glades

putting skins away

skinning up the side of the drainage


It almost felt like summer on Sunday. We skinned up into the backcountry through snow that was fast disintegrating into mashed potatoes, peeling off layers of clothes as the sun rose higher into the sky. Jeremy and I unzipped the side vents in our ski pants and I kept my long-sleeve top on for sun protection rather than for warmth. And this is early February. In the mountains. Above 10,000 feet. I chose this route because Erin was sick over the weekend and told us to ski tour without her. It’s a “No Dogs” trail, which means I would never ask Erin to ski it since No Dogs translates into No Banjo – and Banjo is my puppy buddy.

“It’s just as well,” I muttered to myself as I watched Jeremy make his way up the steepening valley headwall in front of me. The snow was crappy for ski touring and I had already taken Erin on a crappy ski tour the weekend prior (where there wasn’t enough snow). Since I convinced her to pick up skiing and sold her my old gear, I feel obligated to show her how awesome it can be on our local trails. Sadly, the conditions have been less than awesome. Like way less than awesome. But I need to give Erin more credit than that. She’s thrilled to get outside with Banjo to explore our lovely mountains by ski, no matter the lack of snow or overabundance of wind. Aside from Jeremy, Erin is the only person with whom I regularly hike and ski.

On the car ride home from last week’s ski tour, Erin told me she wanted to attempt making meringues. She had heard that our high altitude can cause problems. Was this true? I waved the question away. No, altitude hasn’t posed any problems for me. Meringues are easy. But I told her that I’ve been researching and obsessing over one kind of meringue – all based on a photograph – and I was going to experiment soon. I promised I would report back on my findings. You may or may not have seen the gorgeous giant billowy meringues made famous by Ottolenghi. I’ve actually been oblivious to them until I recently purchased Ottolenghi: The Cookbook. Flipping through, looking for savory vegetable recipes, an image of those signature meringues piled high on a cake plate grabbed my attention. What? How? I need to – they’re so beautiful!


frozen huckleberries, lemon, superfine sugar, more superfine sugar, eggs

egg whites, lemon juice, sugar, sugar, huckleberries


Ottolenghi’s raspberry meringues resemble giant dark pink and white variegated roses. I wanted to create those large cloud-like confections, but there were a few issues to address. First off, my meringues always wind up beige instead of white. Second, how does he apply the berry splatter without turning the meringues soggy? Eventually, with the guidance of this article based on Ottolenghi’s technique and some kitchen testing, I managed to create this obsession I’ve had for the past few months. For the sauce, I used frozen huckleberries (foraged from this past summer), but you can easily substitute fresh or frozen blueberries, raspberries, strawberries… pick your berry.

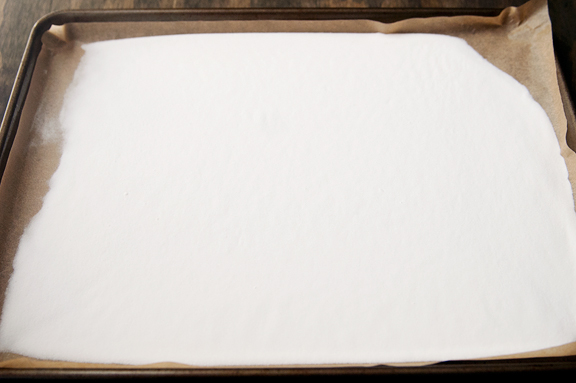
Use superfine sugar, because it will incorporate and dissolve into the egg whites faster than larger granules of sugar. Spread the sugar out on a parchment paper-lined rimmed baking sheet. You’re going to heat this up in a hot oven until it just starts to melt at the edges. When this happens, start whipping the egg whites in a stand mixer on high speed. You really want to use a stand mixer because these need to be whipped for 10 minutes. My arm hurts just thinking about whipping that by hand. You’ll need to move quickly (and carefully) and take the baking sheet out of the oven, lift the parchment (with the sugar) off the pan using oven mitts, and slowly pour the sugar into the whipping egg whites. The directions say not to let the sugar brown in the oven, but mine did a little bit (hey – photographing this stuff makes timing tough). It’s okay, but not ideal. I think if the sugar is liquid (hot), you can pour it into the egg whites, but if you have shards of hardened sugar, don’t add them to the mixer because they won’t dissolve. Also, pour the sugar in on the side of the bowl to avoid any unnecessary excitement. If you pour it directly onto the whisk attachment while it is running, you will have hot sugar flying all over your kitchen.


spread the superfine sugar on a parchment-lined baking sheet

start whipping the egg whites when the sugar begins to melt at the edges

a little too melty, but you get the point

pour the sugar into the egg whites


**Jump for more butter**

no need to fear

February 4th, 2015

Recipe: chinese fermented sweet rice (jiu niang)

We are two weeks away from the Lunar New Year, which I’ve always known as Chinese New Year. If you are wondering what to make for a party or for your own celebratory dinner, I refer you to my Chinese New Year recipe round up from last year to help give you a few ideas.

I consider myself a very lucky girl. I’ve always been pretty happy (except in graduate school – sheesh) and a little silly and very much loved by my family. It’s that love which anchored me from an early age. Wherever I went and whatever I did as a kid, I had a warm fuzzy feeling in my heart. I know now that much of that warm fuzzy was because of Grandma, who was always there for me. We had our routine: a daily walk around the neighborhood, making her bed together every morning (good habits!), putting my hair into cute little pigtails, emptying the sand from my saddle shoes when I got home from school, folding laundry together while watching cartoons. This kind and gentle matriarch would create special Chinese treats from scratch in our 1970s southern Virginia kitchen while I sat on the counter next to her, pretending to be the neighbor’s dog. These memories are so vivid in my mind. I told my friend over the weekend that Grandma has been gone for almost four years and yet I still feel her presence in my heart. She is just that much a part of me.

Last November, when my parents were in Boulder, Mom told me she was going to make jiu niang or Chinese fermented sweet rice. This was one of Grandma’s specialties that I used to sneak spoonfuls of from the refrigerator – that sweet rice porridge floating in rice wine with the slight fizzy tang of fermentation. She would turn it into a hot sweet soup for celebrations or to help kick a cold, flu, or tummy ache. I loved it so much. You can buy it pre-made in Asian grocery stores, but it’s expensive for a pretty small quantity. “Come down and learn how to make it,” Mom commanded. She had been trying for a few years to reproduce Grandma’s recipe, but with mixed results. Now, Mom had finally mastered it with consistency and it meant a lot to her because she too loved, cherished, and missed her mother. It wasn’t something I could put off. Mom and Dad were flying back to Virginia in a few days and as I get older I know not to take time for granted. “Okay, Mom. How about Saturday?”


start with good quality sweet rice

and chinese rice wine yeast


It’s just two ingredients, but you need to get the right two ingredients. You can’t use sushi rice, brown rice, jasmine rice, wild rice, long grain rice, medium grain rice, black rice, whatever rice that isn’t sweet rice – you must use sweet rice. Sweet rice is also known as glutinous rice, which contains no gluten, it’s just really sticky. I’ve shopped around for sweet rice and have seen some bagged varieties with grains that look longish, almost like medium grains. My advice is to get the good stuff. Premium sweet rice resembles short, fat, pearly, oblong grains. As for the Chinese rice wine yeast – it’s jiu qu (see Wikipedia) – a fermentation starter. This one can be tough to find even if you know what you are looking for. It always seems to be tucked away in some random little bin or corner of Asian grocery stores. Luckily for me, Mom had already found them at Pacific Ocean Market in Broomfield, so she told me where to look (by the refrigerated canned drinks at the front near the cashiers). If you can’t find it or if the employees in the store act like your Chinese is just THAT BAD, you can order it from Amazon – but you have to order a dozen and they’re four times as much as what I paid (I paid $.79 for two balls).

2.5 pounds of sweet rice (uncooked) and a ball of chinese rice wine yeast

crush the yeast ball with a mortar and pestle

turn it into a powder


**Jump for more butter**