baked oats green chile chicken enchiladas chow mein bakery-style butter cookies


copyright jennifer yu © 2004-2023 all rights reserved: no photos or content may be reproduced without prior written consent

archive for November 2017

the in between

Sunday, November 26th, 2017

Recipe: shabu shabu (japanese hot pot)

I hope all of my friends who celebrate Thanksgiving had a lovely holiday last week. The university combines Fall Break and Thanksgiving to give a week off from classes, which means Jeremy can work from home. But which home? Well, it always depends on who has better snow come early season – the Front Range or Crested Butte? Both resorts and Nordic centers were looking pretty bleak, so we opted for Crested Butte in the hopes that the backcountry would have some cover.

We were able to ski tour and uphill ski, but we didn’t bother skate skiing as the snow was rather thin in town. For the most part we skied, worked, did some house maintenance, and kept our holiday low key. Crested Butte was especially quiet with more than half of the restaurants closed or on reduced hours for shoulder season until December. With so many locals off to visit families over the week, I stepped in to help someone with meals and dog care. I mean, that’s part of Thanksgiving – the giving.


enjoying lovely trails right after crested butte nordic had groomed

top of the climb on donation day

a 3 month old puppy runs up to say hi

feeling much gratitude for this life with this guy


Instead of turkey, I made sous vide pork chops (an hour in the sous vide and four minutes finished with a pan sear). The only thing that resembled a turkey was Neva’s Thanksgiving meal, which was made of raw beef, cheese, carrot, a strip of ham for the wattle, and two nonpareils sprinkles for the eyes.

neva’s thanksgiving “turkey”

eyes on jeremy as she waits for her release word


You can watch Neva eat her Thanksgiving plate on Instagram, because who doesn’t love to watch a dog eat an animal made of other foods?

Now that Thanksgiving is over, the clock is ticking ever louder as The Holidays approach. I basically have three weeks to figure out how I will turn butter, chocolate, flour, eggs, and sugar into a mess of gifts for Jeremy’s administrative staff, our local service folk, my oncology department, and friends. I don’t celebrate Christmas, but I do think the start of winter is a fine time to let people know how much they are appreciated. The trick is to get that and everything else on my to do list done!

While I would prefer more consistently cold weather and some (actually, a lot) of snow, it’s cool enough that we have been enjoying hot soups, stews, multi-hour simmered sauces, and hot pot. I grew up eating Chinese hot pot on chilly evenings, but it wasn’t until I went out with a girlfriend to a shabu shabu restaurant that I realized shabu shabu was another form of hot pot – Japanese hot pot. There are a lot of similarities in the ingredients, although I must admit the Japanese version is so much cuter. I wasn’t able to source all of the ingredients in the original recipe, but hot pot is more like a set of guidelines, so I went with what I could find and what I had on hand.


tofu, flank steak, enoki and matsutake mushrooms, scallions, napa cabbage, carrot, kombu (dried kelp)

soak the kombu in water


The broth starts with a piece of kombu soaking in water in your hot pot vessel (I use an electric wok here). It needs to soak for at least 30 minutes, so you may as well do that first and then make your sauce and prep your ingredients. There are actually two dipping sauces you can serve with your shabu shabu: a sesame sauce and ponzu. I made the sesame sauce, and it’s as simple as measuring out the ingredients, grating a clove of garlic, and stirring everything together. Nice.

mirin, rice vinegar, sake, sesame oil, canola oil, ponzu, tahini, miso, sugar, garlic

grate the garlic

stir everything together

smooth sesame sauce


**Jump for more butter**

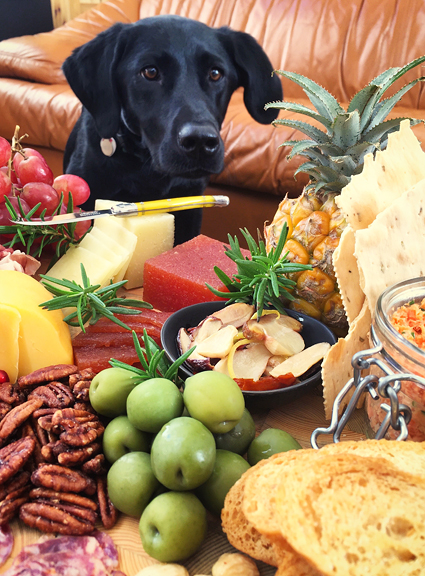
cheeseboarding

Sunday, November 19th, 2017

Recipe: build your own cheeseboard

My parents did a lot of entertaining when I was growing up. It was something I was vaguely aware of as a little kid. Kris and I would belly flop onto my parents’ bed and watch television until we heard the adults move to the dining room for dinner. At that point, Kris would nudge me and say, “Come on, let’s go downstairs.” We’d sneak into the kitchen unseen by the guests (but always seen by Dad, who would flash us one of his goofy smiles as we tiptoed down the stairs) and nosh on whatever was left of the appetizers: smoked oysters, cheese, crackers, olives, caviar. Party food.

Mom and Dad still entertain to this day, so I found it amusing when Dad texted me last year asking what goes on a cheeseboard. He wanted ideas since I had plated a few during various dinner parties they had attended. I grabbed some photos from my archives as well as a handful off of Pinterest to give him some inspiration. When I threw Dad’s belated birthday party at our place last weekend, I made sure to kick it off with a nice cheeseboard because I know my Dad loves a cheeseboard packed with ALL of the goodies.

The holidays are upon us and that means party season is in full swing. Cheeseboards are a lovely way to get a dinner party started or to act as the workhorse for a cocktail party or to keep family and friends occupied as you rush to cook Thanksgiving dinner. If you are looking for ideas to spark your own cheeseboard artistry, I list and show some of my favorites here. There is enormous flexibility in cheeseboards, including not having any cheese!


neva wants to become an olympic cheeseboarder [note: grapes are toxic for dogs]


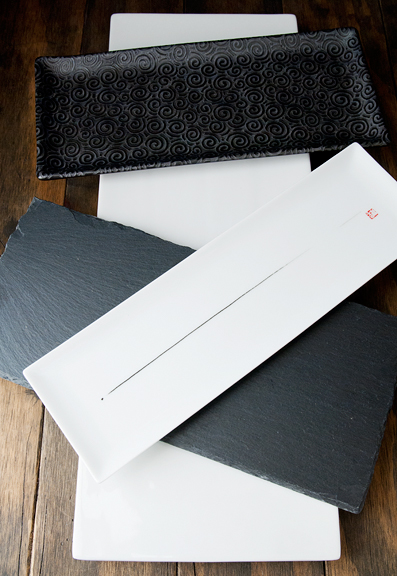
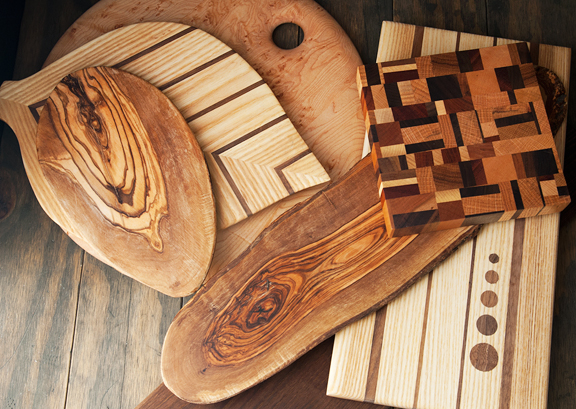
Let’s start with the actual board. The board can be a plate (porcelain, glass, etc.), slate, wood, whatever you like! Plates are the easiest to clean – especially if you serve things that are oily or messy directly on the board. And slate is great for writing the names of cheeses with chalk. I am partial to wood boards because of the beautiful natural colors and grain, which is why I have a lot of them. Some are gifts from my friend, Jamie, who is an incredibly talented woodworking artist. Occasionally, I use my largest Boos cutting blocks (24×18-inch walnut and 20×15-inch maple) because they give me the greatest surface area.

If you do have something oily like hot smoked salmon, and you don’t want the oils to soak into your nice wood boards (because let’s face it, once the board is out, it doesn’t get cleaned up until after the last guest leaves), you can slap a small plate underneath it to keep the fishy smells out of the wood. And remember, cheeseboards don’t have to be these gigantic cornucopias that can feed the whole neighborhood. Small cheeseboards for two are romantic. Medium cheeseboards for a cozy gathering of close friends work very well without being overwhelming. So don’t go crazy, but… you can go a little crazy.


you can serve on plates or slate

wood boards: an array of shapes, sizes, and designs


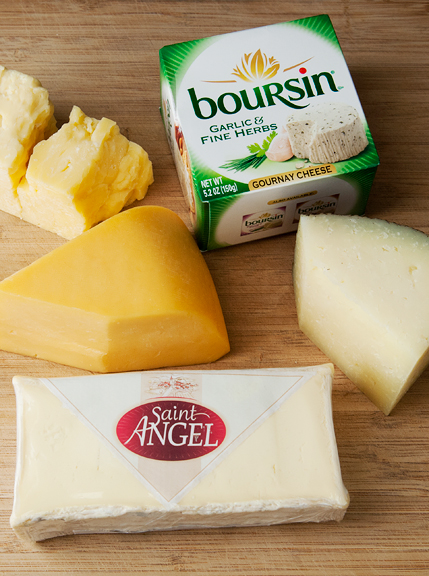
The fun part of cheeseboarding is picking out what to serve on your cheeseboard. It’s whatever you want it to be. I personally like the cheeseboards that don’t have much if any cheese because I don’t dig on eating cheese straight up. But I know the majority of my guests love cheese, so there is always at least one soft, one semi-soft, and one hard cheese. I also have friends who have Celiac disease, so I can either omit all gluten items (mostly crackers and breads) or plate those separately to avoid contamination of the gluten-free items.

Another nice thing about cheeseboards is that they can be as labor intensive as you like – or not! Just about everything can be purchased, but sometimes it’s nice to add your own personal touch. I always make my own crostini and I usually make those prohibitively expensive fruit, nut, and seed crisps unless I am slammed for time. Grissini happen to be quite easy to make at home, too.

I find fruit and fruity things pair well with various cheeses or act as a nice palate cleanser between nibbles. I don’t make my own fruit, but I do make my own fig and brandy jam every summer to serve with brie throughout the year. I have made membrillo, a delectable quince paste in the past to pair with manchego, but it requires a lot of work at my elevation, so I have resorted to purchasing it now that more stores carry it. In late summer, I love it when I can find good fresh figs. Lots of folks like figs with blue cheese and honey, but I tend eat them straight or with a little slice of prosciutto. Another crowd pleaser is baked brie with fresh cranberry sauce or fig jam or tomato jam. Goat cheese and jam is also a hit.


cheeses: aged cheddar, smoked gouda, brie, boursin, manchego

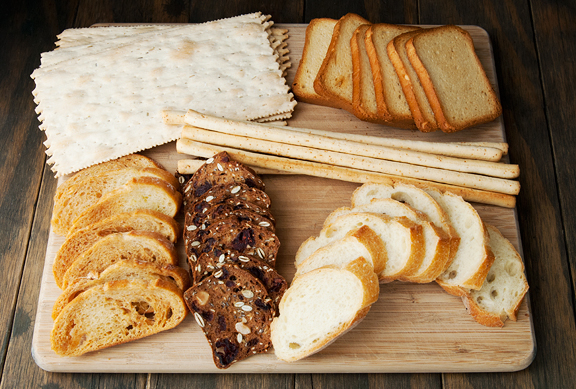
some gluten options: croccantini, brioche toasts, grissini, crostini, fruit and nut crisps, sliced baguette

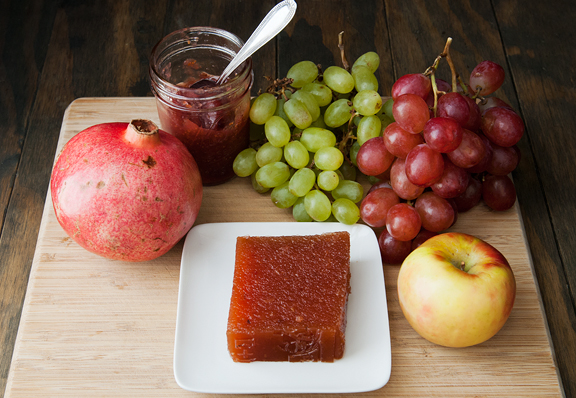
fruity things: pomegranate, fig brandy jam, grapes, apple, membrillo


**Jump for more butter**

small victories

Tuesday, November 14th, 2017

Recipe: chocolate almond macarons (sucre cuit method)

It looks to be another warm November here in the Colorado Rockies. Sure we have gotten some snow, but mostly we’re getting sun and warm – which are the nemeses of snow. I’ve resigned myself to riding my bike on the indoor trainer and getting my balance muscles back in shape on my skate skis in the living room. Even the local trails are slicked over with ice (thanks, sun and warm…). I suppose it’s just as well since my parents are in Colorado for a few weeks. Lack of snow made the logistics of prepping a belated birthday party for my dad much easier.


silly, happy neva

shopping with the parents at costco

dad’s birthday cake (one of three desserts)

toasting with friends and bubbles


Our dinner parties typically offer multiple desserts at the end of the meal, but it isn’t because I set out to make all of these desserts. On any given week, I’m always recipe testing or shooting some dessert, which means these gatherings are the perfect time to move the results of my research. We have had a string of dinners at our house lately (I am hoping we are done until next year) and most of them have involved some version of chocolate macarons. I’ve been recipe testing these suckers for over a month. My friend, Dan, held one in his hand and examined it asking, “What are they?” I said they were sandwich cookies, like Oreos. He took a bite and laughed, “These are nothing like Oreos!” He was right. I hadn’t ever been asked to describe a French macaron, I just gave them to people and figured they would eat them. French macs are almond meringue cookies that sandwich a filling – it could be ganache, fruit curd, buttercream frosting, jam, dulce de leche, or even foie gras in special savory instances.

so simple and yet not


When I have made French macarons in the past, I followed the method of whipping a French meringue and folding it into the almond-sugar base. They looked great, but the cookies were always hollow or as I coined it, had “attic space”. I chalk a lot of that up to baking at my altitude of 8,500 feet. Macs are finicky little guys, but at my elevation, they are a pain in the ass. I stepped away from baking macs for several years with the intention of getting back at it – except I didn’t return to it until now. And I think I’ve got it. What follows is a lengthy discussion of the technique that works for me. It’s more for my own reference, but hopefully it will help someone else out there, too. I’ve tried to detail what I can in the recipe itself and go into greater detail here in the post.

powdered sugar, egg whites and egg whites, almond flour, granulated sugar, cocoa powder, water


Even during my hiatus from baking macarons, they were always on my mind as they gained in popularity and have pretty much jumped the shark (you can now buy them in bulk from Whole Foods and Costco). I spoke with several professional bakers in high altitude mountain towns about issues and tricks regarding these treats. Everyone has their own tweaks and methods that they’ve worked out. I knew that I wanted to try the sucre cuit (cooked sugar) method, which makes an Italian meringue with hot sugar and is supposed to be more stable than the French method.

First things first. I highly recommend using a kitchen scale to make the macarons. I know some people balk at that – some have even gone so far as to tell me that “Here in AMERICA, we use cups…”, but if you 1) want your macarons to work and 2) want to be able to produce consistent results, then you should use a kitchen scale to remove some of the variability. If you choose not to weigh your ingredients and your macarons flop and you complain to me, I’m going to reach through my computer and dope slap you.

You will need at least two baking sheets and some parchment paper or silpat mat to line the top sheet. The reason is that you will double stack the baking sheets (so make sure they are the nesting kind) for a more even bake and rise from the bottom. I bake one sheet of macarons at a time in my oven (because my oven sucks). If I had two trays of macarons in the oven, I know the bottom ones will rise too quickly and the top ones will rise lopsidedly. Also, I don’t know how the macs behave in a convection oven.

It helps that I have quarts of egg whites in my freezer – the result of making too much ice cream and homemade egg pasta. I saved those whites knowing that some day, SOME DAY, I would burn through them in a frenzy of recipe testing macarons. Make sure your egg whites are at room temperature before you start. Another push in the right direction was being able to get superfine almond flour in bulk from Costco. Sure, I can grind my own blanched almonds into almond flour, but I can never get mine to be this fine. Also, for some reason it’s much easier to go back to the drawing board after yet another failed batch of macarons when you simply spoon the almond flour out instead of grinding the almonds yourself. Hey, I’m just trying to reduce as many mental hangups in this process as possible. Because the almond flour I use is superfine, I don’t bother processing it together with the powdered sugar and cocoa powder. If you are starting with blanched almonds (whole, pieces, whatever), you will absolutely need to run those through the food processor with the powdered sugar and cocoa powder (the powdered ingredients help to keep the almonds from turning into almond butter, too).

And if you aren’t interested in making your macaron cookies chocolate, omit the cocoa powder, but replace the omitted weight of cocoa powder with the equivalent weight in powdered sugar. So if you left out 20 grams of cocoa powder, add 20 grams of powdered sugar.


mix the powdered sugar, cocoa powder, and almond flour together (or process in a food processor)

sift the dry mixture to remove any large pieces


When the dry ingredients are sifted (yes, please do this step), pour in 75 grams of egg whites and mix it until combined. Egg whites don’t incorporate the way most liquids do. They take a little time for the dry ingredients to absorb. It will look like there isn’t enough liquid for everything to come together, but keep working at it – it will eventually become a thick, uniform, wet paste. It’s a mini workout for your wrist and arm.

add half of the egg whites to the dry mix

a uniform wet paste


**Jump for more butter**