


silly things we say and do
 Recipe: italian rainbow cookies
This was the scene Wednesday night: an assembly line of gift bags, gift boxes, tissue paper, cards, ribbons, cookies, candies, labels, and a checklist scribbled four times over with crossouts, notes, tick marks, and arrows. Maybe I was tired or maybe I am getting smarter, but as the clock spun ahead into the night, I began to unload cookies from my “to make” list like ballast from a sinking ship. French macarons? No. Peppermint kisses? Nope. Mini sour cream coffee cakes? Jettisoned from the list. I like people, but I like them more when I’ve had more than 4 hours of sleep.
holiday cookies and candies
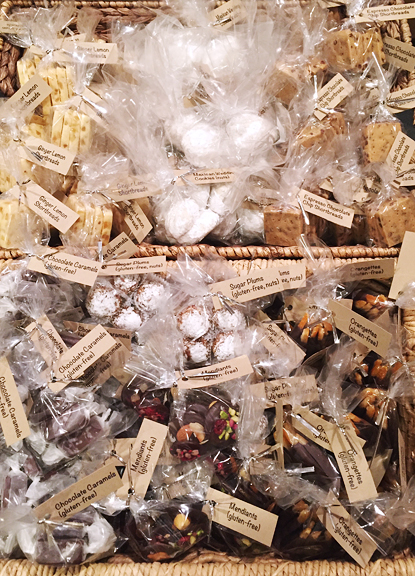
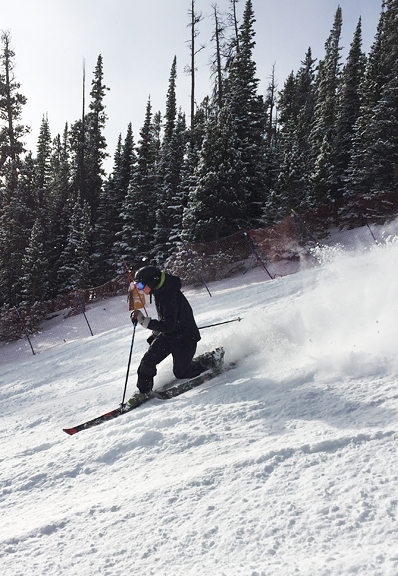
After we had prettied up the packages and set them on the table to ship or deliver the next day, I let out a big sigh (more like an agonized primal scream) and said, “I’m not making anymore EXPLETIVE cookies! And I’m going EXPLETIVE skiing tomorrow!” We actually got four inches of snow overnight, so the logical next step was…
the lovely new high-speed lift that brings us to the powder 8 minutes faster
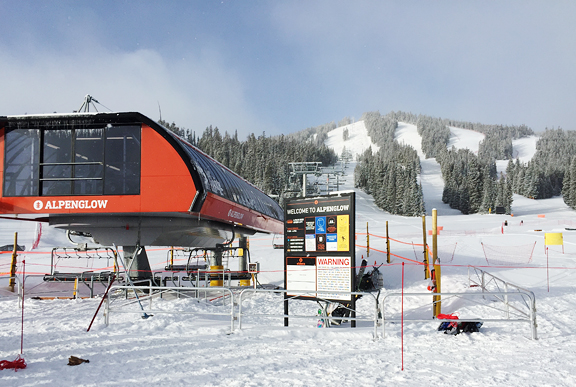
it was good while it lasted
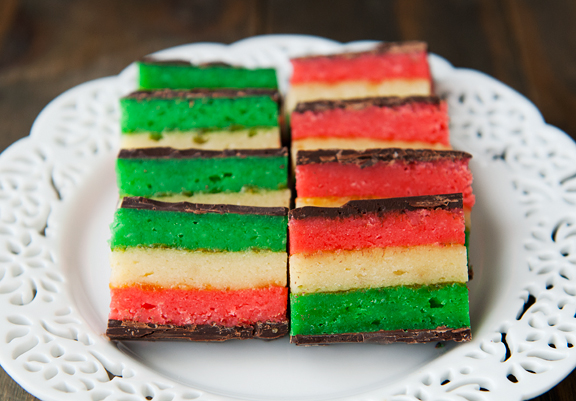
And can you believe less than 48 hours after declaring NO MORE COOKIES, I was in the kitchen making… cookies? It’s true. I kinda blame Jennie Perillo for that. She posted a photo of her Italian rainbow cookies on Instagram last weekend, which prompted me to finally research the recipe and buy the ingredients – except I had all of those holiday cookies to crank out. I put the project on indefinite hold until Jennie posted ANOTHER photo of those gorgeous cookies on Thursday and I waved the white flag.
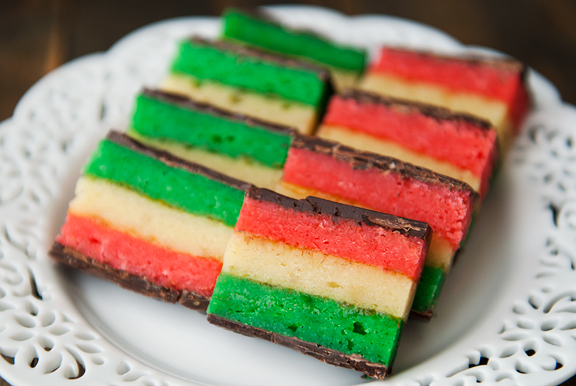
italian rainbow cookies
All my life, I had zero interest in Italian rainbow cookies and here’s why: I assumed they were the same as Neapolitan coconut candies – little sweet tricolor rectangles which I thought were disgusting when I was a kid. No one in my Chinese immigrant family set me straight on the distinction between the two, most likely because they had no idea either one existed. Then a couple of months ago we stopped at Whole Foods to grab a salad and their cookie bar was 50% off. For some reason, I decided to give an Italian rainbow cookie a try and to my delight, it tasted of almonds.
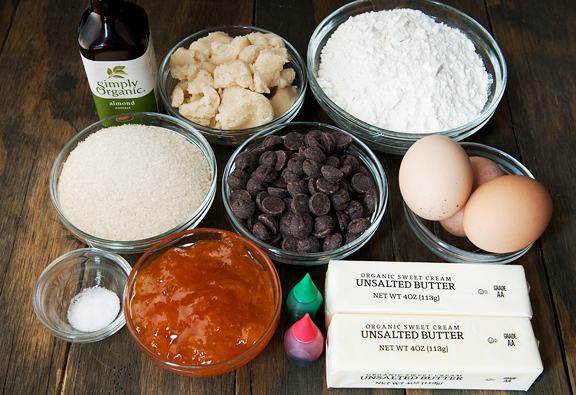
almond extract, almond paste, flour, sugar, chocolate, eggs, salt, apricot preserves, butter, red and green food coloring
There are a lot of recipes for Italian rainbow cookies on the web. They’re also called seven layer cookies or three layer cookies or Italian flag cookies, and they more or less follow the same process and list of ingredients. I found Deb‘s discussion to be quite helpful regarding the chocolate layers and the slicing, but decided on a smaller quantity for my first batch because you never quite know what you’re getting into when you decide to bake something at high altitude. Jennie’s recipe amounted to about 75% of Deb’s quantity and I liked the way she baked all three colors in one pan. So I reduced Deb’s recipe by a quarter and baked it up Jennie’s way. Either way, these are not quick cookies, so set aside a full day or parts of two days.
Most people whip the egg whites first and then make the batter, but I like to reverse that order because no good can come of letting whipped egg whites sit around and deflate while you make the cookie batter. Also, the recipe calls for almond paste, which is not the same as marzipan. Marzipan has a higher ratio of sugar to almond than almond paste. Some of you already know this, some of you do not. Remember what Gandalf said, “I’m trying to help you.”
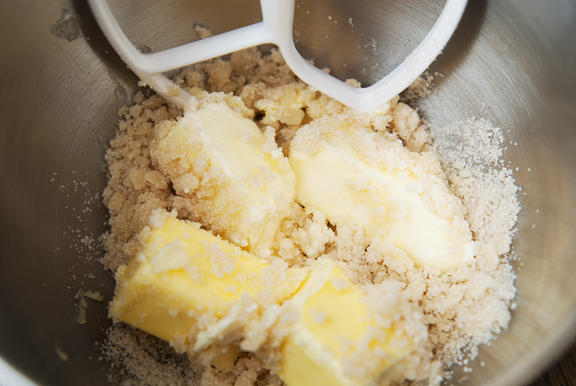
beat the sugar and almond paste together

add butter
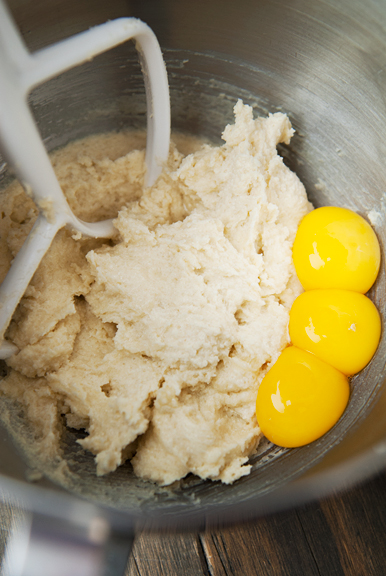
mix in the egg yolks and the almond extract
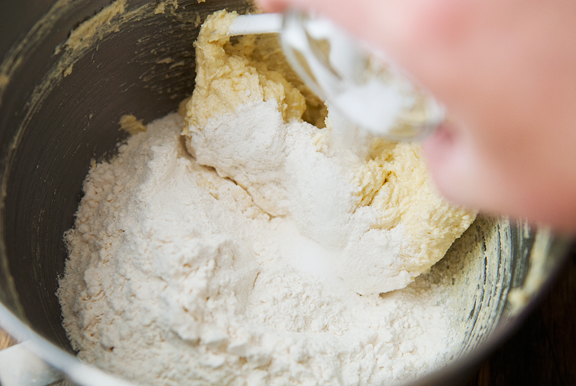
add salt and flour
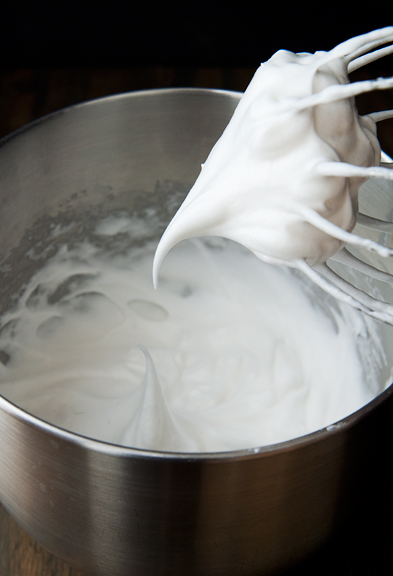
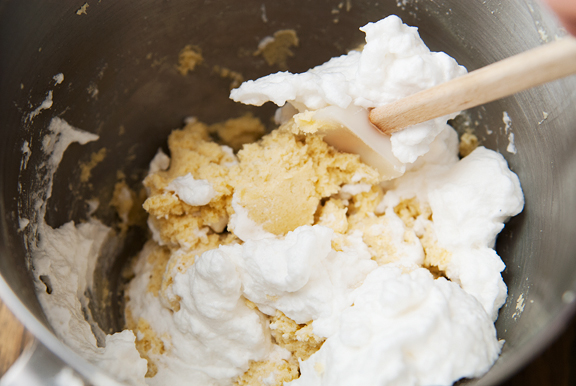
I whipped the egg whites to stiff peaks and then added some sugar to make a delicate meringue. The batter is pretty thick, so it helps to temper it with half of the fluffy and light meringue to reduce the density. This makes it easier to fold in the remaining meringue.
whip the egg whites and a pinch of salt to stiff peaks
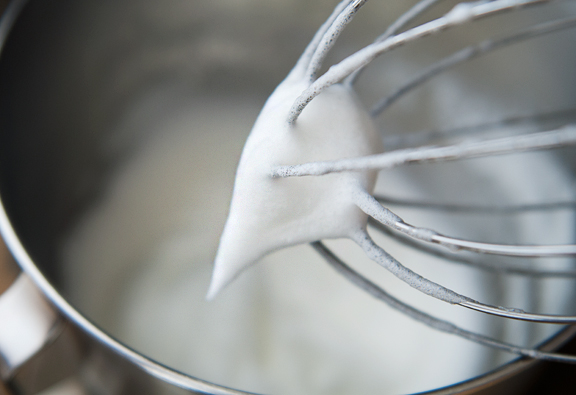
whip on high speed while slowly adding the sugar until glossy and stiff
temper the cookie batter with half of the meringue before folding in the rest
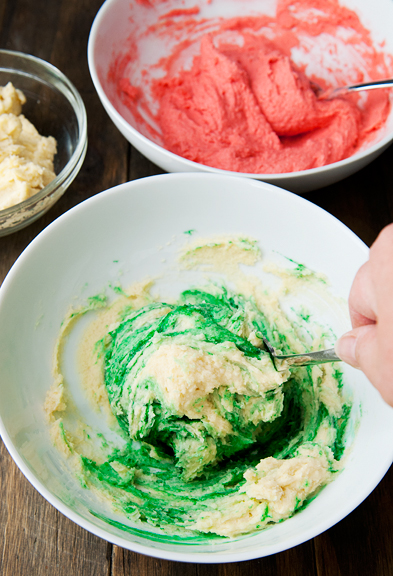
Next you divide the batter into three equal portions. You can eyeball it or you can weigh them out to get a more precise division. Of course, I weighed them. Now we add food coloring to the batter. It’s a lot of food coloring so the layers are vibrant – like a rainbow. I normally try to avoid artificial coloring and flavoring when I can. I’m fairly certain I ingested a lifetime’s worth and then some growing up as a child of the 70s. But I think it’s okay every now and then. You can certainly omit the coloring and the cookie would taste the same, but it wouldn’t look nearly as pretty. Also, you don’t have to use red and green. I have seen some beautiful ombre rainbow cookies in addition to scientifically accurate rainbow cookies that employ the ROYGBIV (Red Orange Yellow Green Blue Indigo Violet) spectrum. You can also try natural food coloring and see how that works out. That’s the beauty of home cooking: you make it what you want.
adding food dye
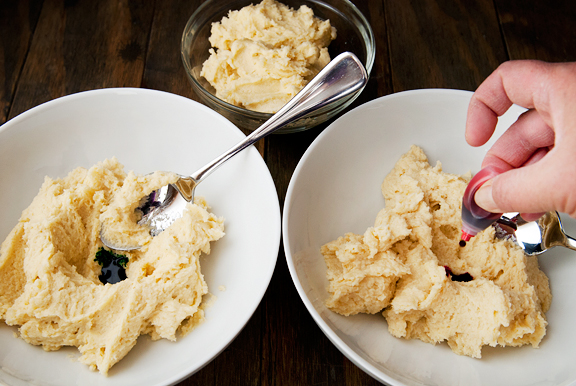
mix until uniform
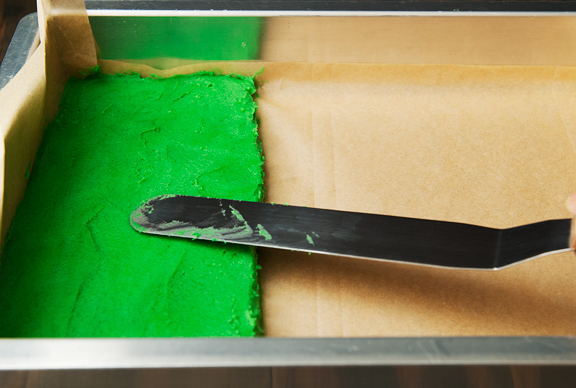
Despite having folded fluffy, light meringue into the batter, it is still pretty thick stuff. But that’s a good thing if you want to bake all three layers in one pan, because it means they won’t run together into a form of abstract art. I actually made two batches of these cookies because I worried that the cookie layers of my first batch were too thin. The first time around, I baked the layers in a rimmed 11×17-inch baking sheet. I haven’t eaten enough of these cookies to know what size they should typically be. So on the second round, I baked the same amount of batter in a smaller pan (9×13-inch), which produced taller cookie layers. Some folks bake the layers one at a time in a single 9×13-inch pan. If you do the thirds method, I recommend folding your parchment in thirds so the creases guide where each batter boundary should be.
All of the baking instructions I’ve read warn against overbaking the layers. A toothpick inserted into the center of the pan should come out clean even if the cookie is still very soft. I give a range of recommended baking times, but my layers took longer – possibly because my oven sucks, because of my elevation, or because it’s me. So don’t rely on the timer the first time around. Use the toothpick test. And you definitely want to line the pan with parchment because that’s the easiest way to handle the layers as you remove them from the pan. Once the cookie has cooled, lift the layer out using the extra parchment overhang on the sides. I found it infinitely helpful to lift the layer by holding the four corners (this requires another set of hands). Holding the two ends with two hands felt very unstable, as if the layers would buckle.
spread the first batter on one third of the pan
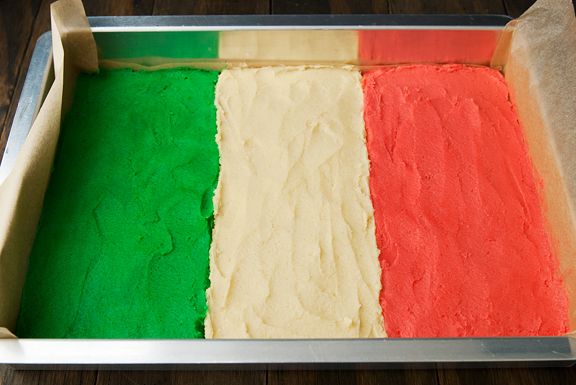
all three batters
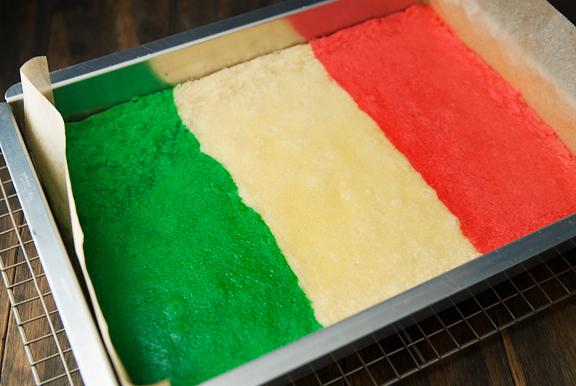
baked and cooling
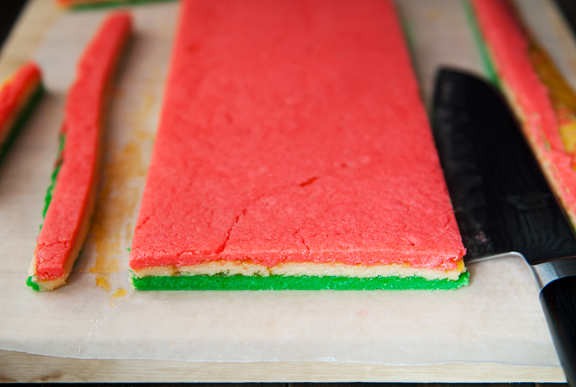
slicing the layers
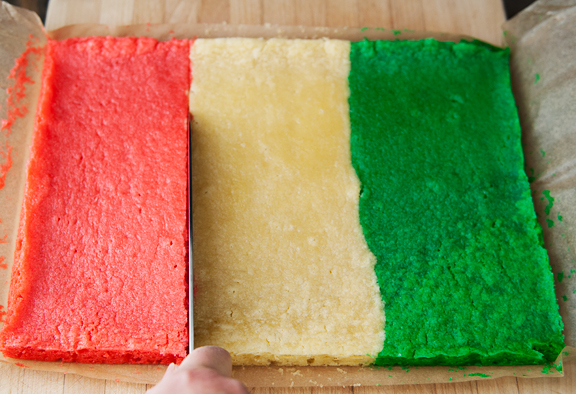
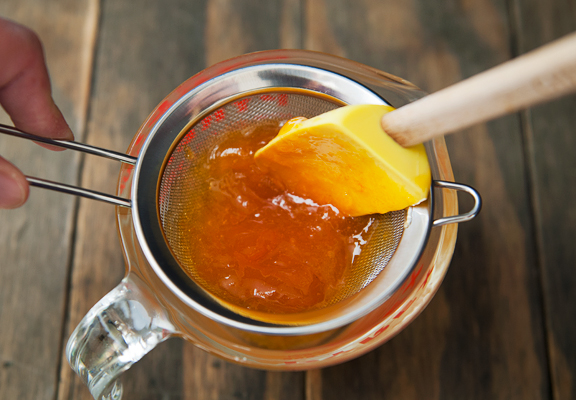
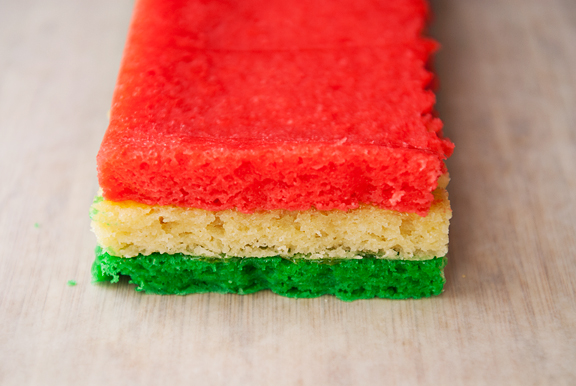
Before assembling the cookie stack, heat the apricot preserves and strain out any chunky bits. And if you have serious objections to apricot, you can use orange marmalade or raspberry preserves instead. I personally think the apricot is lovely. Set the green layer on a sheet of wax paper and brush half of the preserves over the layer. Set the plain layer on the green cookie and spread the rest of the preserves on the plain cookie. Top the whole thing with the red layer. If you make the thicker cookie (in the 9×13-inch pan) you will have a smaller surface area, which means you should use a little less of the preserves for each layer. If the preserves are spread too thick, they will ooze when you cut the cookies and make a mess.
strain the warmed preserves
brush preserves on top of the cookie layer

top the stack with the red layer
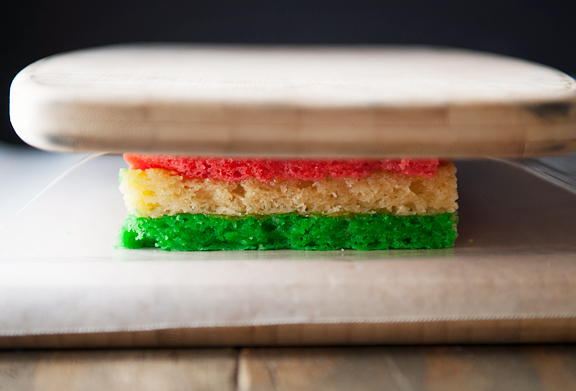
cover with wax paper and weigh down with a baking pan or cutting board
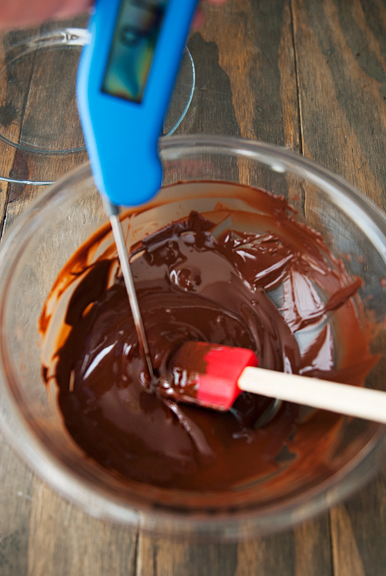
Let the stack chill in the refrigerator for several hours. While my second stack (the taller one) chilled, my shorter stack was ready to trim and coat in chocolate. To spread the chocolate, you can either melt it gently over a water bath or in the microwave (half power, 30 seconds at a time), or you can temper the chocolate. The benefit of tempered chocolate is the distinctive snap, lovely shine, and greater ability to withstand temperature fluctuations after the chocolate has set. However, untempered chocolate is softer and might actually cut more easily. I haven’t tried untempered chocolate, but I wanted to toss that out there.
Spread half of the chocolate over the cookie stack, smoothing it nicely. You can coat the edges if you like, but I didn’t. Tempered chocolate will set up in minutes. Untempered chocolate can be placed in the refrigerator to help it set faster. If your chocolate fell out of temper while waiting for the first layer of chocolate to set, then you’ll want to re-temper it before spreading the rest on the other side of the cookie stack.
trim the edges of the cookie stack
tempering chocolate
spread half the chocolate over the stack

When the last layer of chocolate has set, wrap the cookie stack in wax paper and freeze the entire thing for a half hour or more. Freezing helps to firm up the cookie layers which are soft at room temperature and crush easily under the force of cutting the hard chocolate lid. I’ve used both a serrated knife and my santoku knife to slice the cookies and prefer the santoku, which does a better job making a clean cut through the bottom hard layer of chocolate. Whatever you use, there will be shards of chocolate everywhere. These cookies are quite intense, so they don’t need to be cut very large.
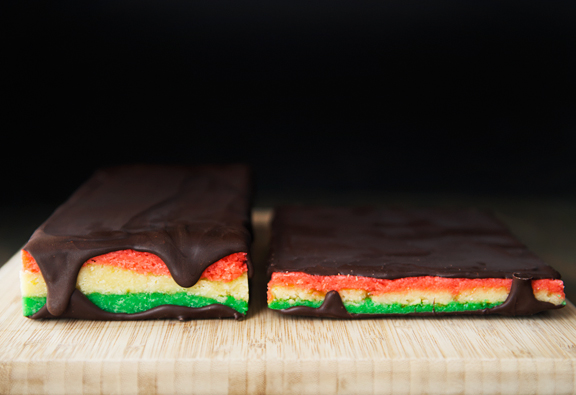
both stacks with chocolate on top and bottom
slicing the frozen cookies
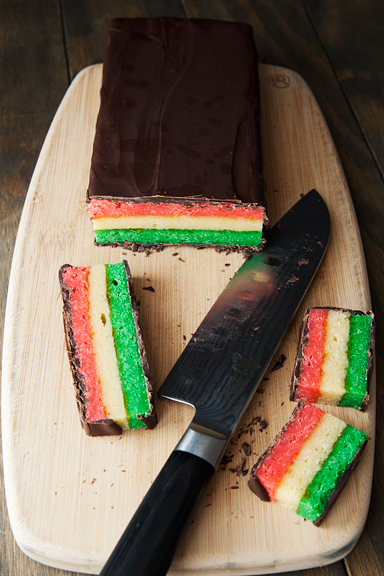
comparing the height of the two batches
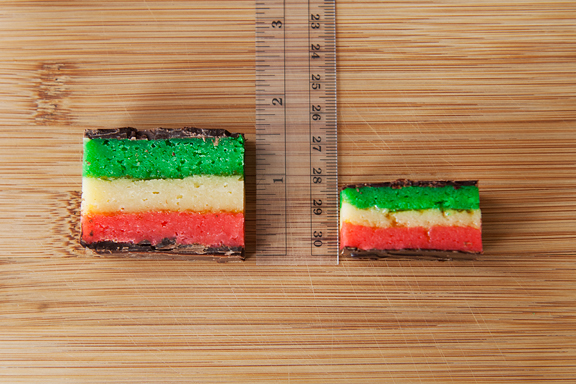
So what did I think? I first tasted the scraps of cookie stack without any chocolate and thought they were good, not great. But when I took a bite of a proper cookie with the two chocolate layers, I felt that this was perfection. The bitterness of the dark chocolate balances nicely with the sweet, soft layers of almond cookie and the tangy sweet apricot preserves. These cookies are fun and pretty and best of all, delicious. And to think I was missing out all those years!
colorful
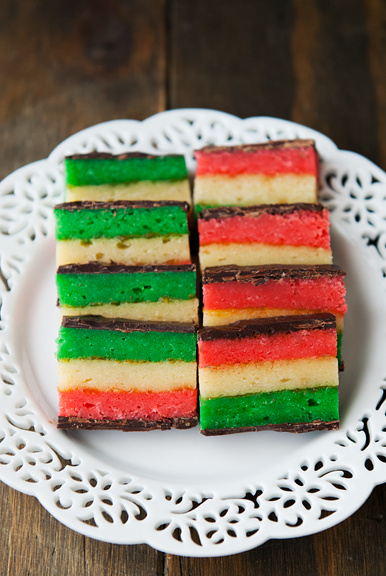
making up for lost time
Italian Rainbow Cookies
[print recipe]
from Smitten Kitchen and In Jennie’s Kitchen
3/4 cup (6 oz.) granulated sugar, divided into 3 tbsps and 9 tbsps
6 oz. almond paste (NOT marzipan – they are different)
15 tbsps unsalted butter, room temperature
3 large eggs, separated
3/4 tsp almond extract
1 1/2 cups all-purpose flour
1/4 tsp + pinch salt
18 drops red food coloring
18 drops green food coloring
1/2 cup (6 oz.) apricot preserves, heated and strained (warmed as needed)
6 oz. semisweet dark chocolate, chopped
Preheat oven to 350°F. For shorter cookies, line an 11×17-inch rimmed baking sheet with parchment paper, leaving 2-inches of overhang on two opposite sides of pan. For taller cookies, line a 9×13-inch baking pan with parchment paper, leaving 2-inches of overhand on two opposite sides of the pan. Tip: I like to fold the parchment in thirds along the short axis of the pan, essentially dividing the pan into thirds.
Using the paddle attachment on a stand mixer, beat the almond paste and 9 tablespoons of the granulated sugar together for about 3 minutes until more or less mashed together. Add the butter and beat on medium speed until pale and fluffy (about 3 minutes). Beat in the egg yolks and the almond extract for another 2 minutes until combined. Add the flour and 1/4 teaspoon of salt, mixing on low speed until just combined.
In a clean mixing bowl, beat the egg whites and a pinch of salt together on medium speed using the whisk attachment until the whites just form stiff peaks. Slowly pour the 3 tablespoons of sugar into the egg whites while whipping on high speed until the meringue becomes stiff and glossy. Stir half of the meringue into the almond batter to lighten the dough. Fold the remaining half of the meringue into the batter so there are no white streaks.
Divvy the batter into three equal portions in three separate bowls (you can leave one portion in the mixing bowl). Add 18 drops of green food coloring to one bowl of plain batter and add 18 drops of red food coloring to another bowl of plain batter. Stir each bowl until the batter is uniform in color. Spread the green batter over a third of the baking pan. Spread the plain batter over the next third of the pan. Finally spread the red batter over the final third of the pan. Use an offset spatula to help push the batter into the corners. It won’t flow before baking, but once it is in the oven, the batter will flow some and fill any gaps. It’s okay for the batters to touch.
Bake the 11×17-inch pan for 8-13 minutes until a toothpick inserted in the center comes out clean (the cookie will be soft – that’s okay). If using the 9×13-inch pan, bake anywhere from 11-19 minutes (it all depends on your pan and your oven and your batter) until a toothpick inserted in the center comes out clean. Remove from oven and let cool in the pan on a rack.
Once cooled, you can remove the cookie to a work surface. Use four hands (on the four corners) to quickly and carefully lift the layer to your work surface. Two hands run the risk of potential structural collapse of your layer as you transfer it out of the pan. Cut the layers into three equal sections according to their color. Set the green layer on a sheet of wax paper. Brush half of the strained warmed apricot preserves over the green layer. Set the plain layer on top of the green layer. Brush the remaining half of the apricot preserves over the plain layer. Top the ensemble with the red layer. Lay a piece of wax paper over the top of the stack and gently press down with your hands to level the three layers to a uniform height. Weigh the top down with something flat like a baking pan or a cutting board. It doesn’t need to be outrageously heavy. Chill in the refrigerator or a cold place for 4 hours or overnight.
Remove the cookie stack from the refrigerator and trim the edges with a knife (and a ruler if you’re that kind of person… I am that kind of person). Allow the stack to come to room temperature. Temper or gently melt half of your chocolate. Spread the chocolate evenly over the top layer of the cookie stack to cover the entire surface. Allow to cool and solidify. You can place the stack in the refrigerator, too. When the chocolate layer is completely set, cover it with wax paper and invert it so the bottom is facing up. Temper or gently melt the rest of the chocolate and spread it evenly over the surface of the cookie stack as you did for the other side and allow it to set. Wrap the stack in wax paper and freeze for 30 minutes or longer. Remove from freezer and slice into desired dimensions. For the tall (9×13-inch pan) cookies, I got 34 cookies at 1/2 inch by 2 inches. For the short (11×17-inch pan) cookies, I got 56 cookies at 3/4 inch by 1 1/4 inch. These will keep in an airtight container for up to 2 weeks, or in the freezer for a month (or more).

more goodness from the use real butter archives

|
chocolate almond macarons (sucre cuit method) |

|
almond crunch cookies |

|
almond lace cookies |

|
chinese almond cookies |

December 18th, 2017 at 1:03 am
So glad you got snow and can ski. I admire all of your baking projects. It reminds me of my mother who used
to make homemade candies and then send them around the world to her friends. The Italian cookies are beautiful. Today was bad as I accidentally nudged my camera and knocked it off unto the floor. it and the telephoto lens are broken. But as far as disasters go, it could have been worse. I’m enjoying your photos even more as a result. Wishing you a very Merry Christmas, Ann
December 18th, 2017 at 1:10 am
Red, white and green. The colors of the Italian flag.
December 18th, 2017 at 1:16 am
These are on my list of “to make if I still have time,” though the time is definitely dwindling. I absolutely love them, but you’re right–it’s not a quick process! Yours turned out beautifully!
December 18th, 2017 at 4:26 am
Jen, thank you for sharing this cookie recipe. I am sure they are delicious. I am not sure I will make these, but I loved reading every word about making them. What are your two favorite cookies to make? Thank you for your wonderful blog. I Love It. Wishing you and your family a happy and safe Christmas holiday. Linda from Asheville.
December 18th, 2017 at 4:43 am
These look so beautiful! What do you do with all the scraps? I would have the hardest time throwing them out and end up just eating all of it to avoid waste.
December 18th, 2017 at 5:16 am
I was just looking at Deb’s recipe last night as I plan to make it! But now I will make yours instead, as a smaller batch sounds much more reasonable. thanks!!
December 18th, 2017 at 6:30 am
I made Deb’s version two weeks ago (still have half frozen but not iced) and I think I licked every bowl, spoon, and spatula clean. So yummy. My son didn’t want the traditional coloring, so we tried blue and purple, but skimped on the purple, so it ended up looking like cookies for a both sex twin baby shower. Still tasted great!
December 18th, 2017 at 8:52 am
You are a *genius*– I have had my eye on the SK recipe ever since she published it years back, but the quantity/three rounds of baking has always deterred me. Your adjustment is exactly what I needed! Thank you, Jen!
December 20th, 2017 at 10:54 pm
I made Jennies recipe and was pleased with the results, tastes just like I remember when I was a kid, and such a colorful addition to the cookie selection. Happy Holidays, hoping you guys get lots of snow!
December 22nd, 2017 at 12:33 pm
I make these too. They are a staple in the italian-american community. Traditionally, you use apricot and seedless raspberry jam- one layer of each. The flavor will be even better!
Great idea to bake them all in one pan!
And for the love of Christ- please think about getting rid of that awful “I’m not a robot” image verification & you’ll get many more comments!!!
December 27th, 2017 at 9:04 am
Mouth watering! Had these in Chicago growing up….
Glad you got to enjoy the fresh powder! xojill
December 29th, 2017 at 3:08 pm
Ann – Oh, that’s terrible! I’m sorry about your camera. I hope you can get them repaired! I hope you had a merry Christmas despite the accident xo
Anna – Yes, they are! That’s why they’re also known as Italian flag cookies (as noted in the post).
Jen – Thank you!
Linda – Thank you, I hope you had a lovely holiday, too! My two favorite cookies to make? Probably lemon ginger shortbreads and French macarons (when they work) :)
Binsy – We eat them! :)
Kelly – It’s Deb’s recipe with Jennie Perillo’s technique! Both bakers for whom I have enormous trust and respect.
Kristin – Ha ha! They sound fantastic!
Eesh – The three pans is a bit of a deterrent for me, too. That’s probably why I hadn’t tried them sooner!
farmerpam – How awesome <3 Happy holidays, my dear!
Ann - I'll make a note of that for the next time I make these cookies. Thanks. As for the bot filter... The reason for the filter is to reduce the amount of spam I receive. Would you like to know how many I was getting before instituting the bot filter? TENS OF THOUSANDS per week. I sift through the spam filter to extract any real comments that might have accidentally been captured, but that's impossible to do when you have that many spam comments a week. It's not about the number of comments I get (I couldn't care less), it's about sharing information with folks.
Jill - Thank you, Jill! xoxo